Showing posts with label Cricut. Show all posts

Friday, July 20, 2012

Birthday Goodies with the Cricut

Hi all

Well I have finally gotten back in my craft room.  Yeah!!!  So we have a couple birthdays coming up so that is what I have been focused on in my craft room.  Today I have a couple items I made for a little girls birthday this weekend.  She is turning 4 and her Mom is throwing her a Princess tea party.  I decided to make her a t-shirt and a card, all Princess themes of course.  Here is the t-shirt:


I found this great t-shirt on clearance at Target.  I loved the sequins on the shoulders, and this little girls is very glamorous.  I used Expressions Vinyl heat transfer vinyl in white, purple, and pink.  The images and text are from Once Upon a Princess.  See my post here on how to cut the vinyl with the Cricut.  Here is the card I made:


Card Recipe:

  • Used the Cricut Craft Room and a square from the Craft Room Exclusives to make the card
  • Princess is from Princess Party cut at 3"
  • Doodlebug rainbow twin pack
  • Sentiment from My Pink Stamper
I decided to make a window card of sorts inspired by the current challenge over at Bitten By the Bug 2.   I really do think it is a great idea.  Well hope you have enjoyed the post, I may have another one tonight if I can get into gear.  The little princesses older brother is also having a birthday this weekend!!!  Thanks for stopping by.

Sunday, July 15, 2012

Birthday Card with the Cricut

Hello there, I know its been a while since I posted.  I just got back this week from the long trip to my parents house.  We all had so much fun, especially the kiddos.  I am so glad to be back though, I missed my hubby and my craft room.  So tonight I am sharing a birthday card I made for a little girl turning 3.


Card Recipe:
  • A2 sized card
  • Birthday Birdie from Birthday Bash cut at 3"
  • Number 3 from Birthday Bash cut at 1.2"
  • Sentiment from My Pink Stamper Sweetest Cupcakes
  • Pentouch Sakura White gel pen for faux stitching
So that is that.  I am entering this card in the birthday challenge over at Cooking with Cricut.  I hope you have enjoyed the card and thanks for stopping by.  I will be crafting all week for Birthdays coming up so check back for some more fun birthday inspiration.

Monday, July 2, 2012

Vacation and a Late Post

Hi all

We are still here in sunny Florida.  It is actually cooler here than back home so I am glad we are down here this week.  It is still hot but it helps that my parents have a pool and we are only 10 minutes from the beach.  That is were went ventured today.  The kids had a blast.  The only problem is that my 2yo does not like being dirty so every time she would get sand on her hands we had to run down to the water to clean them off.  In some ways it is really nice having a child that does not like to be dirty but in others it can be a hassle.  Here is a picture of the little ones at the beach.


So the project I have this week is a Father's Day project that I didn't get to post.  I got the idea off of Pinterest, one of my time sucks.  The link I had was actually and etsy shop that was selling it and I thought I could whip that out in about five minutes with my Cricut.  So here it is.


This is an 8.5" x 11" sheet of white card stock.  The tree is cut from the Ultimate Creative Sampler at 8.5".  I then cut all the leaves off the tree to have only the trunk and branches.  The text below is from Plantin Schoolbook cut at 0.8"  Then I just used kids paint in red and yellow to do their hand prints.  The one thing I did learn in this project is that I should double up on the card stock before doing the hand-prints.  There is a little crease in the paper from how the paint dried.  My husband absolutely loved this gift and plans to hang it in his office.  Thanks for stopping by and hope you have a great week. 

Thursday, June 28, 2012

Elmo Birthday T-Shirt with Cricut

Hi all

Hope the week is finding you well.  We are still here with family.  It is amazing how much more time I have for blogging when I don't have my craft room to work in.  But that just means I get to share more of my projects with you.  So today I have a T-shirt I did for my husband's co-worker.  Her little boy is turning 1 soon and she wanted an Elmo birthday t-shirt for him.  So here is what I came up with:


So for this T-shirt I used a product that I am new to, Expressions Vinyl.  I ordered all the colors I needed of the heat transfer vinyl.  After watching some videos on their website, I quickly learned how to work with it and the Cricut.  I learned that the key is not to cut through the plastic transfer backing, only the vinyl.  This was done by setting my blade to 2, speed to medium and pressure to medium.  It was really easy to work with and I think this is my favorite t-shirt medium so far.  The one trick also is that you need to flip all your images.  This is easily done in CCR though.   Once the images are cut you just use your iron to transfer the vinyl to the t-shirt.  Here are the details on the cuts.

T-Shirt Recipe:
  • Font from Elmo's Party cut at 1" and 1.5"
  • Font from Plantin Schoolbook cut at 1.6"
  • Elmo face from Elmo's Party cut at 5.5"
  • Streamers from Elmo's Party cut at 2"
  • Expressions Vinyl
Thanks for stopping by and I hope you have a fantastic weekend.  

Wednesday, June 27, 2012

Magnetic Dress Up with the Cricut

Hi all

So I am now in sunny Florida, (not so sunny with the storm at the moment).  The car ride went spectacularly well, no major meltdowns with the kids.  We did have to make it a two day drive though because of the storm, but we made it in one piece.  So last week I posted about the car ticket travel game.  It was a smashing success!!  Every time I asked the girls for a ticket, it was like a party in the car.  They would get excited and start singing "ticket time, ticket time".  Then they would diligently count how many tickets they had left.  So I highly recommend this game if you have a long distance to travel with the kids.

So the project I have for you today was also intended for the car.  I made the girls a magnetic doll dress up craft.  They really loved it and I am glad because it took me about 7 hours to complete altogether.  I will show you the pictures and then list the cuts and sizes.  It is a long list so read only if you really want to know the details.


So I used some printable magnetic sheets I got at Staples.  The come four sheets to a pack, 8.5 x 11" for about $10.00.  I needed to use the deep cut blade and housing with a setting of 6.  The pressure was set to high, and the speed to 3.  I also needed to use the multi-cut feature set to 2.  I used only one cartridge, Once Upon a Princess.  The cookie sheet you see was from Walmart and was only $ 0.92.  I did have to add extra magnets to the outfits after all the paper went on, because they didn't stick to well.  I don't think these magnetic sheets are intended to have paper on top of them.  So here is the list of cuts and sizes.  It is long, so if you made it this far thanks for stopping by. 

Cuts on the Magnetic Sheets:
  • Castle Base - 5"
  • Frog Base - 2"
  • Unicorn Base - 2.5"
  • Doll 1 Base - 4"
  • Doll 2 Base - 4"
  • Doll 1 Layer - 4"
  • Princess 1 Base - 4"
  • Princess 2 Base - 4"
  • Mermaid Base + Layer 1 Welded together - 4"
  • Dress 1 Base - 4"
  • Raincoat shift + Only raincoat boots - 4"
  • Cowgirl Base + hat - 4"
  • Pajamas Base - 4"
So the paper cuts are made at the same size above with the layers added for the decorations.  If you want a detailed list of the paper cuts please just leave a comment.  Also much of the time spent on the project was in making the cut files in the Cricut Craft Room.  If you would like my CCR files just leave a comment.  Well thanks for stopping by and I hope this has inspired you to create some of your own travel games.

Thursday, June 14, 2012

Shaped Father's Day Card with CCR

Good evening,
Hope all has been well.  We have been enjoying the wonderfully mild weather here.  Although it has been so mild the pool has been too cold, so I have had to find other ways to entertain the kids.  But it is better than it being scorching hot.  So today I have for you a shaped Father's Day card.  I got the inspiration from the Fantabulous Cricut design team.  I have always wanted to try a word art card and the word Dad seemed like to perfect fit.  So here it is:


Card Recipe:

  • Font and Font Shadow is from Birthday Bash cut at 3"
  • Chair is from Life is a Beach cut at 1.9"
  • Sentiment from Simply Charmed cut at 2"
  • Crop-a-dile for the eyelets
  • Ribbon from Michaels
So to do this card you need either the Cricut Craft Room, which is free, or a Gypsy.  The key in CCR is to not use the font feature.  Select each letter from the cartridge images.  You need to do this because to create the base of the card you need to edit the actual letter image.  In CCR you choose edit image and then hide the inside cuts.  (I realize I am not explaining this very well and really should do a video on this).  You need to do this on each of the letters (Font Shadow) for the base card and then weld the letters together.  Then just cut the Font separately to adhere to the card.  If anyone needs help with this leave me a comment and I will do a video with step by step instructions.

So there it is.  I am entering this in the Father's Day Challenges over at Fantabulous Cricut and My Craft Spot.  Hope you have a great evening and thanks for stopping by.

Tuesday, June 12, 2012

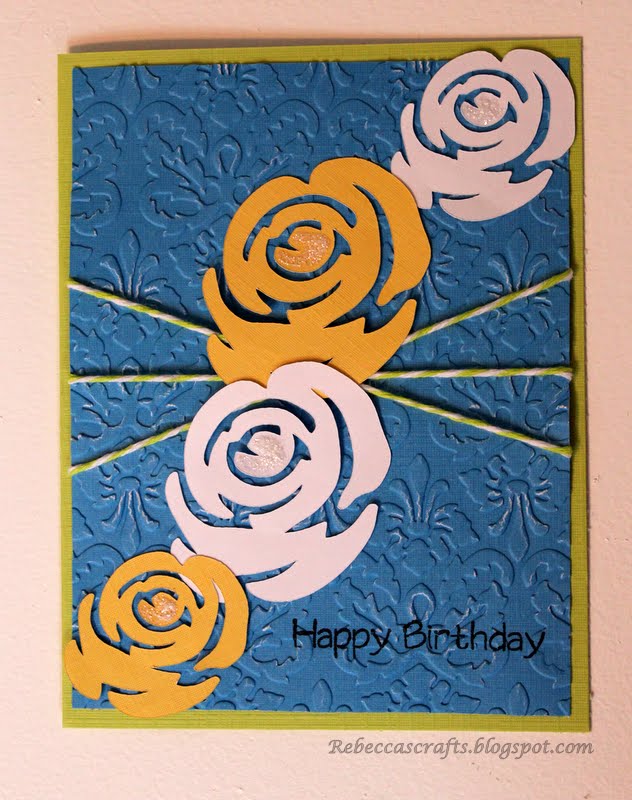
Rose Birthday Card with Cricut

Hi all, hope your week has been going great.  We are busy busy with summer!!  Also getting ready for father's day.  I think this is one of my girl's favorite days because they love their Daddy so much.  So my project for today is a card I made for a friend of mine.  She celebrated her birthday over the weekend and I wanted to make her a card for her special day.  I was having trouble coming up with an idea so I turned to some challenge blogs for inspiration.  I came across the Bitten by the Bug 2 challenge which is themed around roses and decided to go with it.


Card Recipe:

  • A2 sized card
  • Indie Art Roses cut at 3" and 4"
  • My Minds Eye lime twist twine
  • Flourish Cuttlebug folder
  • Frosted Lace stickles
  • Sentiment from My Pink Stamper Family and Friends
I really love how the Cuttlebug folder kinda distressed the blue paper, gives it a little more dimension.  This card was pretty fast to put together.  That's what I love about the challenges, they can sometimes inspire my creations.   Hope you have enjoyed and thanks for stopping by.


Thursday, May 31, 2012

Baby Shoes Card using the Cricut

Hi

How is everyone's week going?  We are doing great, enjoying the warm weather and lounging at the pool.  So for today's project I have another congrats baby card.  My cousin had a new arrival a couple weeks ago and I wanted to make him and his wife a card to congratulate them.  Here it is:


Card Recipe:

  • Card stock from DCWV textured stack
  • Card base cut from Elegant Edges, Lace at 5" and then two welded together to make a card
  • Light pink frame from Elegant Edges, Lace at 4.3"
  • Shoes from Kate's ABCs  at 2"
  • Sentiment from My Pink Stamper Sweet Baby
  • Ribbon from Michaels
Thanks for visiting and hope you all have a fantastic week.

Tuesday, May 22, 2012

Graduation Card with the Cricut

Hi all, hope your week has been going well.  Ours has been pretty good.  We got off to a good start this week, with meal planning and the like.  I even went to the gym before 9 am!!!  That is a feat around here.  Anyhow, I am bringing you a Graduation card I made for my darling 4 year old.  She is graduating from pre-school tomorrow.  She is so excited because she gets to sing with all of her class mates for the parents.  I can't wait to see if she actually sings once she gets in front of all those people.  So here is the card.


Card Recipe:

  • DCWV textured card stock cut down to an A2 size card
  • White card stock cut to 4" x 5.25" and embossed with the Swiss Dots Cuttlebug folder
  • Ribbon from Michaels
  • Girl cut from Once Upon a Princess at 3"
  • Outfit cut from Once Upon a Princess at 3"
  • Graduation cap made from two shapes in the Cricut Craft Room Basics
  • Tassel made with We R Memory Keepers Watermelon Floss
  • Sentiments from My Pink Stamper Sweet Baby and Family & Friends
Well thats the card.  I love how the tassel came out.  I found out after I made the card that her cap is white.  Had I known I would have customized that.  Oh well.  I am entering this card into two challenges this week.  The Graduation challenge over at Fantabulous Cricut and the Congratulations challenge over at My Craft Spot.   Thanks for stopping by, I hope you have a great week. 

Wednesday, May 16, 2012

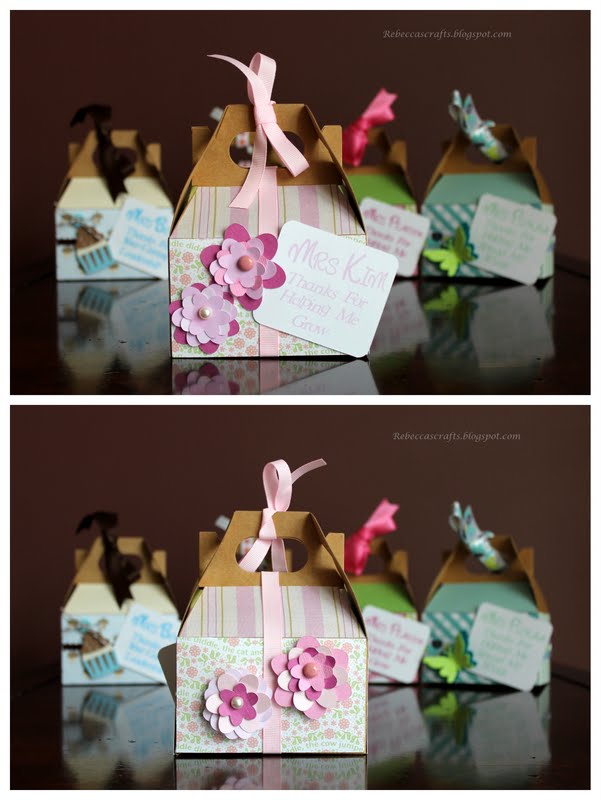
Teacher Appreciation Gifts with the Cricut

Hi all, I am back as promised with some Teacher Appreciation gifts I did last week.  These came together pretty fast and the teachers loved them.  I will not list a recipe for each, just a list of cartridges that I used to create them.


So I used these great gable gift boxes I found a Target in their dollar section.  Them came 3 to a pack for a dollar.  You can't beat that!!  I used a variety of patterned papers to decorate the sides of the boxes and some ribbon from my stash.  The tags I printed and cut with my Imagine.  It took a while to figure out how to get it to just print and them cut.  It involved putting the text on one layer in the Craft room and the square on another layer.  Then you just print on the paper first and then go back and cut the second layer afterwards.  I used the font from the Once Upon a Princess cartridge for all the tags.  The cartridges I used for the images are below.

  • Butterflies are from Kate's ABC's and Ultimate Creative Sampler
  • Birds are from Create a Critter
  • Flowers are from Kate's ABC's
  • Cupcake from Once Upon a Princess
So there you have it.  I filled the boxes with candy and a Target gift card.   I had a bunch of fun doing these boxes.  Thanks for visiting and hope you have a wonderful week. 

Monday, May 14, 2012

Mother's Day with the Cricut

Hi all, I have been missing for a while.  Not much crafting going on here with so many people in an out.  The place I have to craft is my dining room table, so when we have guests I can't really craft.  But my wonderful hubby gave me the best gift for Mother's Day.  He is going to build me a custom craft desk for our loft.  It is his office currently, but he is rarely in there anymore due to offsite work commitments.  I can't wait till it is done!!!
Anyhow, today I have a card I made for his mother.  It is kinda simple just like his mom so I think it came out great.  She really isn't a girly girl so I though blue would be best.


Card Recipe:
  • Card base is from Wrap it Up cut at 5.25"
  • Mom is from Ultimate Creative Sampler cut at 4"
  • Card stock is from DCWV
  • Flourish Cuttlebug folder
 So I am getting back on track with this post.  I have some teacher's gifts and Cinco de Mayo stuff that I did to share with you later in the week.  I hope you all get a chance to express your creative side this week.  Till next time!!!


Monday, April 23, 2012

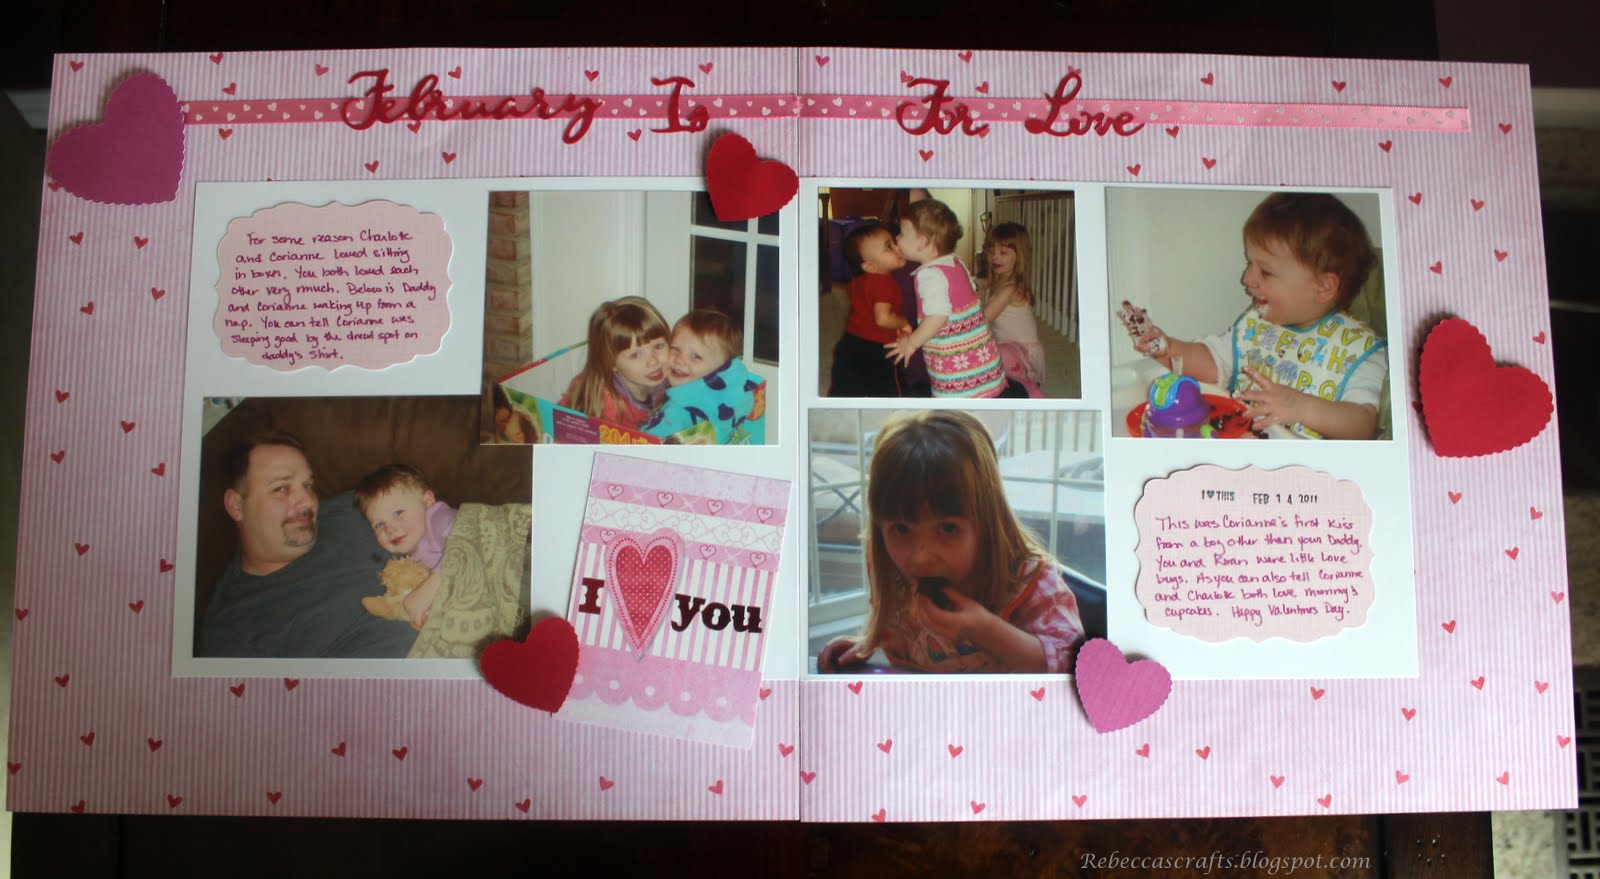
Scrapbooking with the Cricut

Hi all, hope you have had a good weekend.  I had a pretty good one, spent the evenings getting some much needed scrapbooking done.  I love scrapping but always have a hard time getting started.  Well this weekend I decided I was going to get started on our 2011 family album.  I have done first year albums for my girls but never a family album.  I though the first couple layouts came out pretty good.  I am not going to list recipes for the pages only the Cricut cartridges I used.  So here we go.


Cricut Cartridges Used:

  • Plantin Schoolbook
  • Kate's ABCs
  • Stretch Your Imagination
  • Cricut Craft Room Basics
  • Gypsy Font

 So there they are.  I think I got a pretty good start and am going to try and dedicate one night a week to scrapping until I get the album done.  I am now going to start working on some projects for Teachers Gifts.  Not sure what I am going to do yet.  If you have any ideas for Teacher Appreciation week I would love to hear about them.  Have a great week.

Tuesday, April 3, 2012

Cricut Crafted Easter Cards

Hi all, I have been missing for a while but I am back with my final round of Easter Cards.  Finally got them all finished last night and plan to mail them out tomorrow.  I have three cards today.  I think the kids are going to love them.  The first card is an Easter basket card.  I used one of the new Cricut Digital cartridges Easter for this card.


This card was really quick and easy to put together.  I think it is the little touches with the ribbon and stickles that make the card special.  I am entering this card in the Fantabulous Cricut Egg challenge this week.

Card Recipe:
  • Easter basket cut from Stretch your Imagination at 4.4"
  • Eggs cut from the digital cartridge Easter at 1"
  • Happy Easter from digital cartridge Easter at 2"
  • Ribbon from Michaels
  • Crystal Stickles
The second card is a tulip Easter card.  This was another really simple card to put together.


Card Recipe:
  • A2 sized card
  • Bunny frame from Elegant Edges cut at 5.25" (This is the oblong feature)
  • Tulips from digital cartridge Easter cut at 3.25"
  • Banner from the Ultimate Creative Sampler cut at 1"
  • Swiss dots Cuttlebug Folder
The third and final card is an Easter bunny card.  This is a shape card made by welding two images in the Cricut Craft Room.  The card base is the stamp shadow from Elegant Edges.  I welded two of them together to make the shaped card.  I am entering this card into the Easter challenge at My Craft Spot this week.


Card Recipe:
  •  Card Base is the stamp shadow from Elegant Edges cut at 5.5"
  • Card frame Elegant Edges cut at 4.9"
  • Bunny with carrot from Simply Charmed cut at 4"
  • Happy Easter is done using Gypsy Font cut at 1"
Hope you enjoyed the cards and have a wonderful Easter.  Thanks for stopping by.

Saturday, March 24, 2012

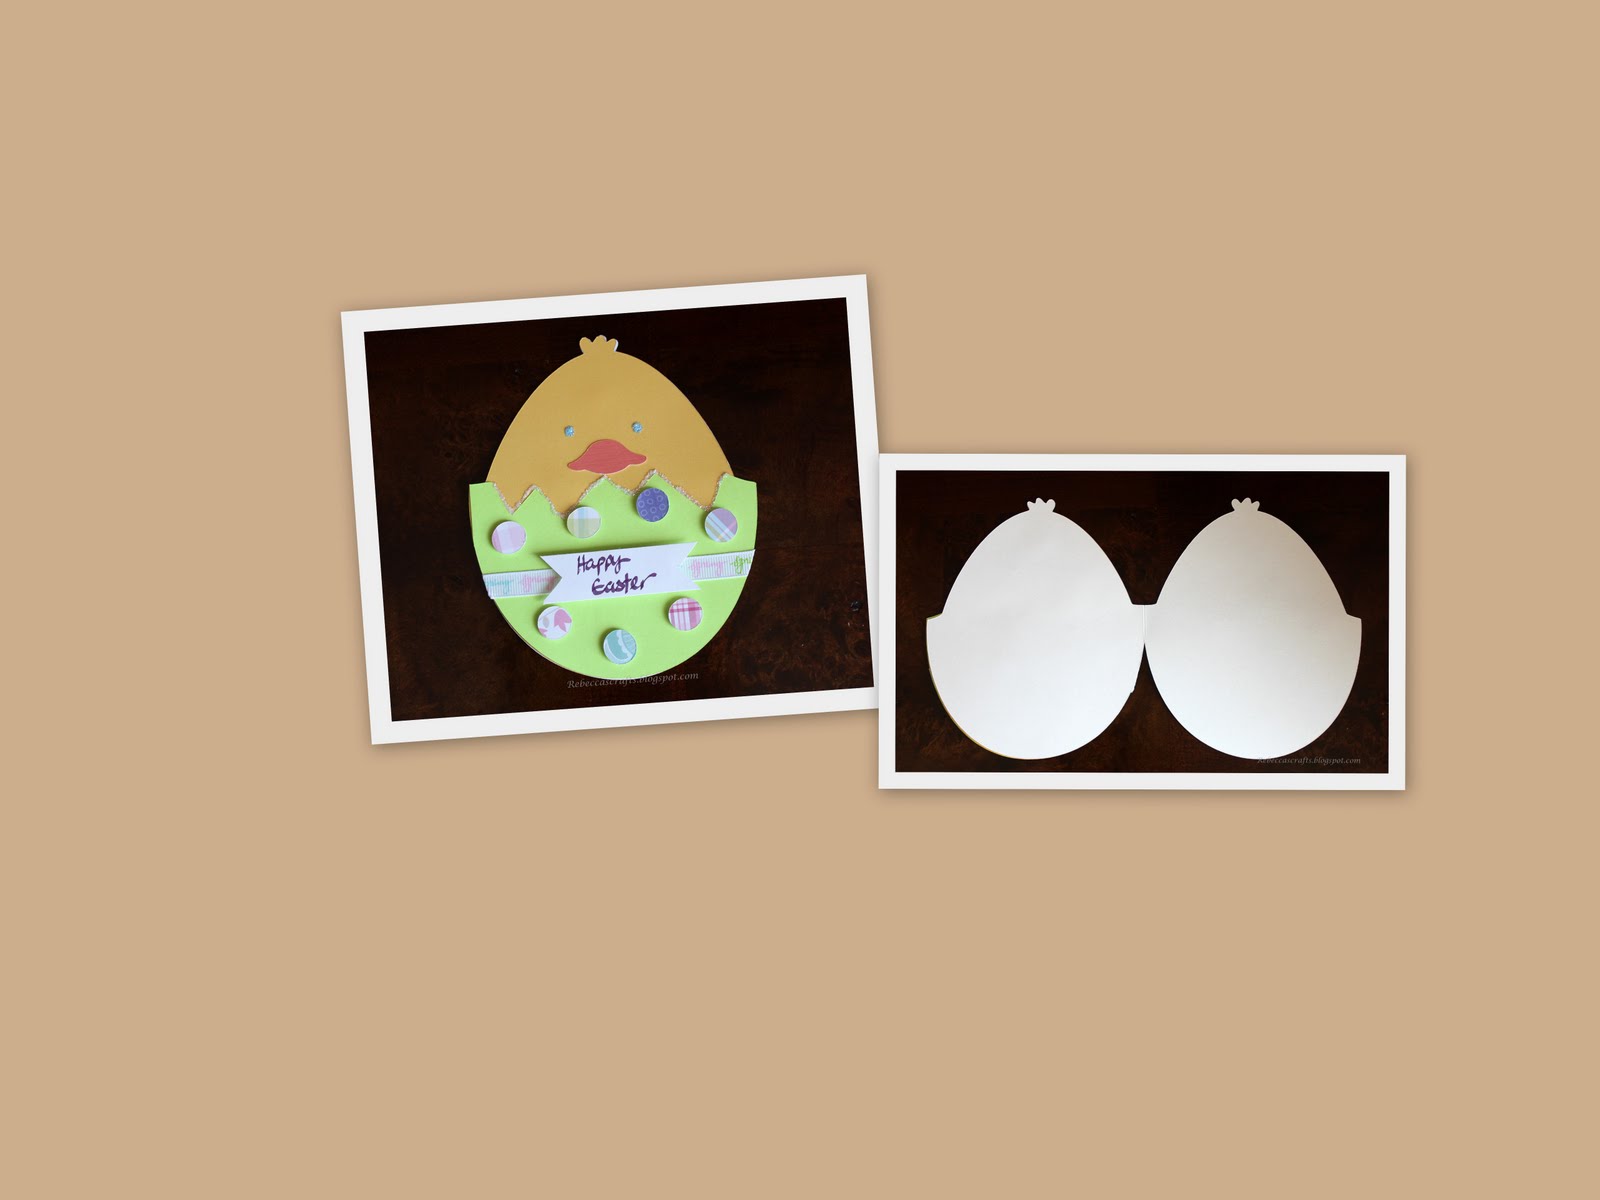
Shaped Easter Cards - Part II

Hello all, hope you are having a great weekend.  We are having a wet one here on the east coast.  So wet the Easter Egg hunt for today was cancelled.  That's okay though, because we are still going to head over to our friends house for dinner tonight, should be fun.  We today I am continuing with the Easter theme here.  I have made two really cool shaped cards to give for Easter.  These are incredibly easy to do with the Craft Room by Cricut.  Here is the first card.


This first card is made from the Create-a-Critter cartridge.  There is the image of the cracked egg.  I placed this on the mat in the Craft Room and then copied and flipped it horizontally.  I then welded the two eggs together to make the card.  I then used scrap pieces of pattered paper to make to stripes on the egg.  I think this is one of my favorite cards I have made to date.  Just came out so darn cute.  Oh and again, all the paper for this card came from my scrap paper bin, yeah!!  I am entering this card into a challenge over at the Twineology blog.  

Card Recipe:
  • Cracked Egg from Create-a-Critter cartridge cut at 4"
  • Chick from Create-a-Critter cartridge cut at 3"
  • Twine from Timeless Twine
  • Flower and button from stash
  • Google eyes from dollar store
The second card I have for you is along the same lines but a different shape.  I used the same welding method described above in the Cricut Craft Room to make the card base.


Card Recipe:

  • Hatched Chick and layers from Simple Charmed Cartridge cut at 5.5"
  • Spring ribbon from Michaels
  • Scrap pattered paper for the polka dots
If you would like the cut files for these cards for the Craft Room or the Gypsy let me know and I will email them to you.  Hope you have enjoyed the cards and have a fantastic weekend.

Thursday, March 22, 2012

Easter Cards - Part 1

Hi all, I hope that the week has been going well.  I finally got to some crafting last night and made my first of several Easter cards that I will be making this year.  I love this time of year because it means that everything is in bloom and there are new beginnings.  This first card that I made really has all the bright colors that I love.


I base the color design around the ribbon.  I don't have any Easter stamps so I let the ribbon do the work for me.  Also all the paper used on this card was from my scrap bin.  I get excited anytime I don't have to use a brand-new piece of paper.

Card Recipe:

  • Card base is 5" x 5" white card stock
  • Scalloped matting is cut from the Elegant Edges cartridge at 4.75" 
  • I used the Cuttlebug polka-dot folder to emboss the mat
  • Bunny scene is from Kate's ABC's cut at 3"
I will be posting many more Easter/Spring cards as I get them finished.  I am entering this card in the weekly challenge over at My Craft Spot.  Thanks for stopping by, I am now off to get my hair done, yeah!!!!

Thursday, March 15, 2012

St. Patrick's Day Card

Good evening all.  I hope your week has been going well.  We have had the best weather here so we have been spending much of our time outside.  So the project I have for you today is to celebrate St. Patrick's day.  My husband is actually Irish so I thought I would make him a card.  When I told him I was making a card he said "do we normally exchange cards on St. Patrick's Day?".  My response to him was no I am not expecting a card in return and it is really just an excuse to craft.  So here it is:


Card Recipe:

  • A2 size card base in Kraft
  • Frame is from DCWV Bloom stack cut at 5.25" from Elegant Edges - Oblong Clover cut
  • Shamrock is from digital St Patrick's Day cartridge cut at 2.8"
  • Sentiment is from two My Pink Stamper sets: Everyday Life and Friend-tastic
  • Gold Stickles
  • Crop-a-dile for the eyelets
  • Corner Chomper to round the corners
So that's my card, I plan to write some gushy note inside just to let him know I love him.  I also made some Irish Car Bomb Cupcakes (for adults only) from a recipe that I found on Pinterest.  They came out really yummy.  No picture though because I can make a cupcake taste great but my frosting skills are a little lacking.   I am entering this card in the challenge over at My Pink Stamper.  She had the monthly blog hop all about St. Patrick's Day.  You should definitely check out the projects because they were great.  That's it for me, hope you have a wonderful weekend.


Sunday, March 11, 2012

St Patty's Day T-Shirts and Video

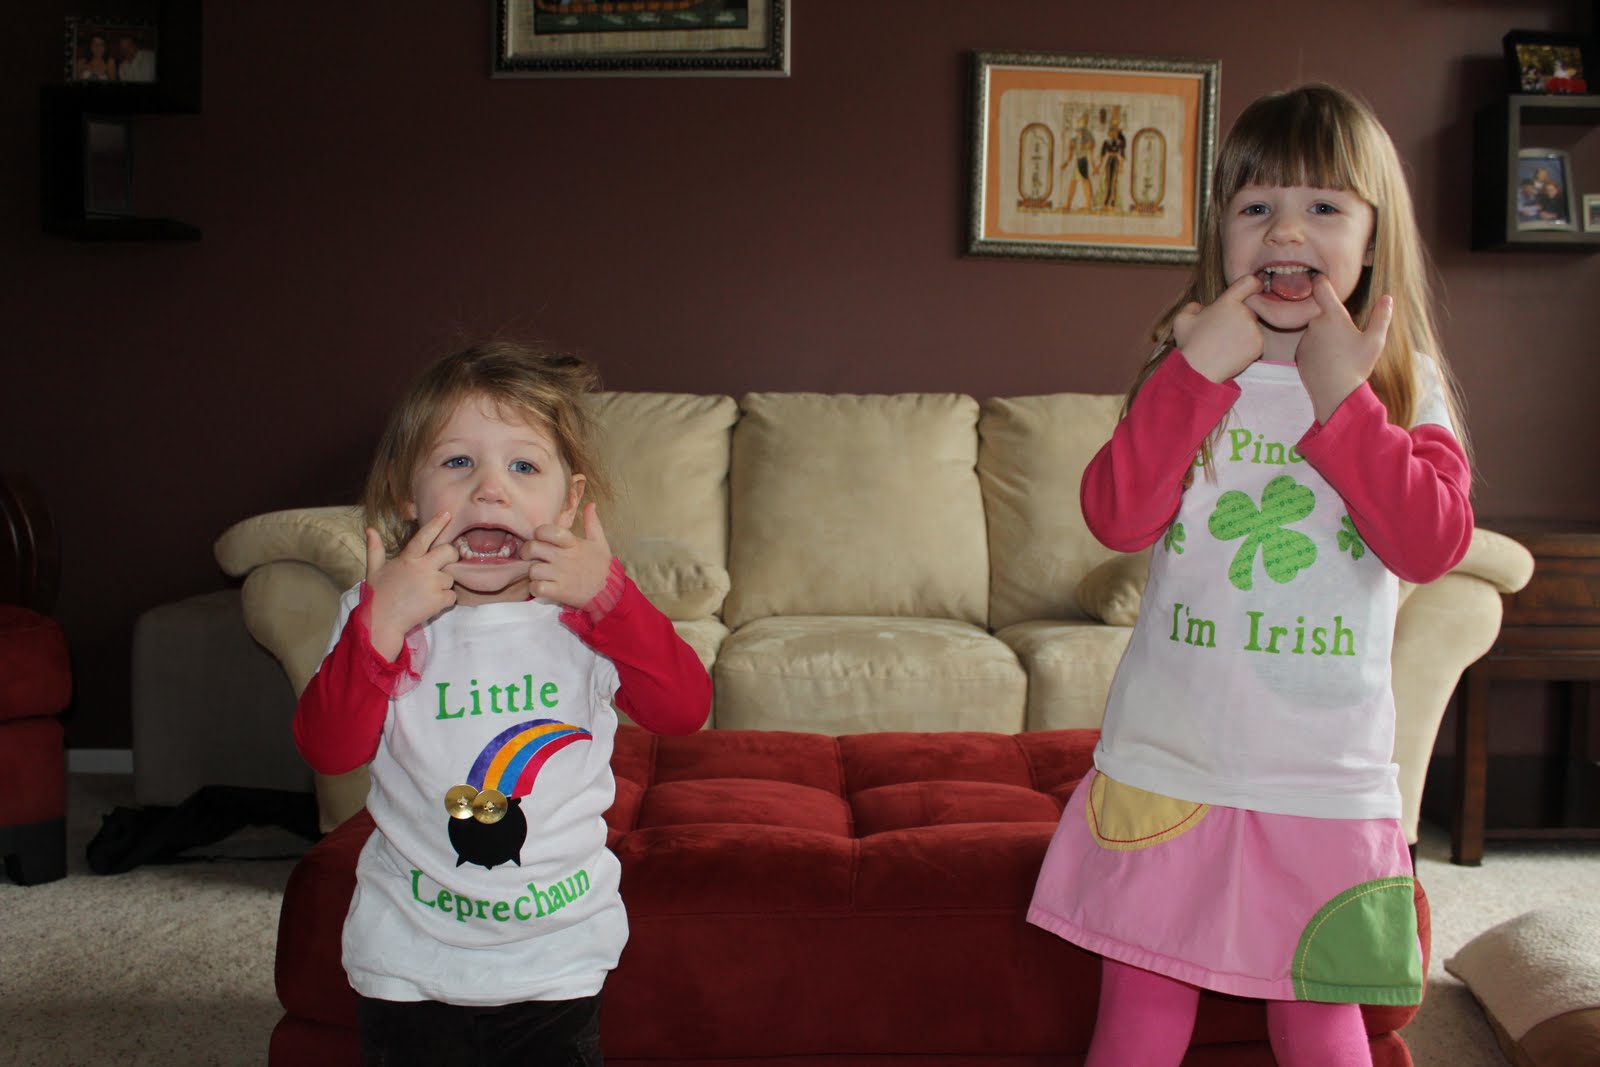
Good evening all.  Hope you have had a great weekend.  We had a pretty low key one here.  Just hanging out enjoying the nice weather.  So my project for today is some T-shirts I made for my girls.  I really think they can out super cute and can't wait for them to wear them for St Patrick's Day.  These shirts are different from ones I have done in the past because I used fabric instead of paint for the decorations.  I used my Cricut to cut the fabric and learned a lot in the process.  I also made a video for you to share some of my tips.  Here are the shirts.


Didn't they come out great.  I love the gold buttons on the pot of gold.  Here is the video and I will put a recipe at the end.

T-Shrirt Recipe:

  • T-shirts:  I use regular t-shirts from Target instead of the craft store because they are softer and have more shape
  • Heat n' Bond
  • Fabric and embellishments from fabric store
  • Ironing Board and Iron
  • Shamrocks from Cricut Digital cart St Patrick's Day cut at 3.5" and 1.3"
  • Rainbow and Pot of gold from Simply Charmed cut at 2.4"
  • Text from Plantin Schoolbook Shadow cut at 1.12"
 So I hope you have enjoyed my video and the project.  The number one tip I can give you for cutting fabric is to use a new cricut blade.  It will reduce any tearing of the fabric.

I have decided to enter this project in two challenges this week.
I will leave you will a picture of my cuties in their t-shirts.  Have a great week!!


Tuesday, March 6, 2012

My Craft Planner

Good Evening all, as promised I am back today to post a project that I have been working on for about a week now.  It is a craft planner.  Now, I know that it is already March but I still wanted to put together a planner for my crafts.  I feel like it will help me better manage my crafting time so that I can get the projects done that I really want without having to rush through them at the last minute.  This project took me about a week of 2 hour crafting sessions to complete but I think it came out really great.  This will be a picture heavy post, so if you just want the planner recipe just skip to the end!!!


The chipboard is cut to 11.5" x 9".  The cover paper is from this really cool stack that I found in the clearance section of Jo-ann's for $0.99.   It is a stack from Colorbok called English Moss.  It is unique because it is an overlay with coordinating card stock.  The picture below shows it much better.

Oh an the paper is not dirty, it is made to look distressed which is really neat.  Now the rosette on the front is also made from unique paper.  It is the new fabric paper from DCWV.  I really love it and can't wait to use more of it.  The paper is fabric with an adhesive backing.  So to make the rosette I just cut a strip of the paper and removed the backing and then started bunching it around.  The adhesive on the back of the paper made it stick together.  I then used a button and some twine from The Twinery.

The inner pages of the planner are from a website I came across on Pinterest.  They are a free printable that is unique to blogs/crafts planning.  Here is the link to the website. 


I loved the colors on these printables, which was really the basis for the planner design.  The artwork on the inside cover on the picture above is from the Cricut Imagine More cartridge.  I wanted to have a place to jot down notes.  The dividers between the months also have the notebook paper design on them as well.


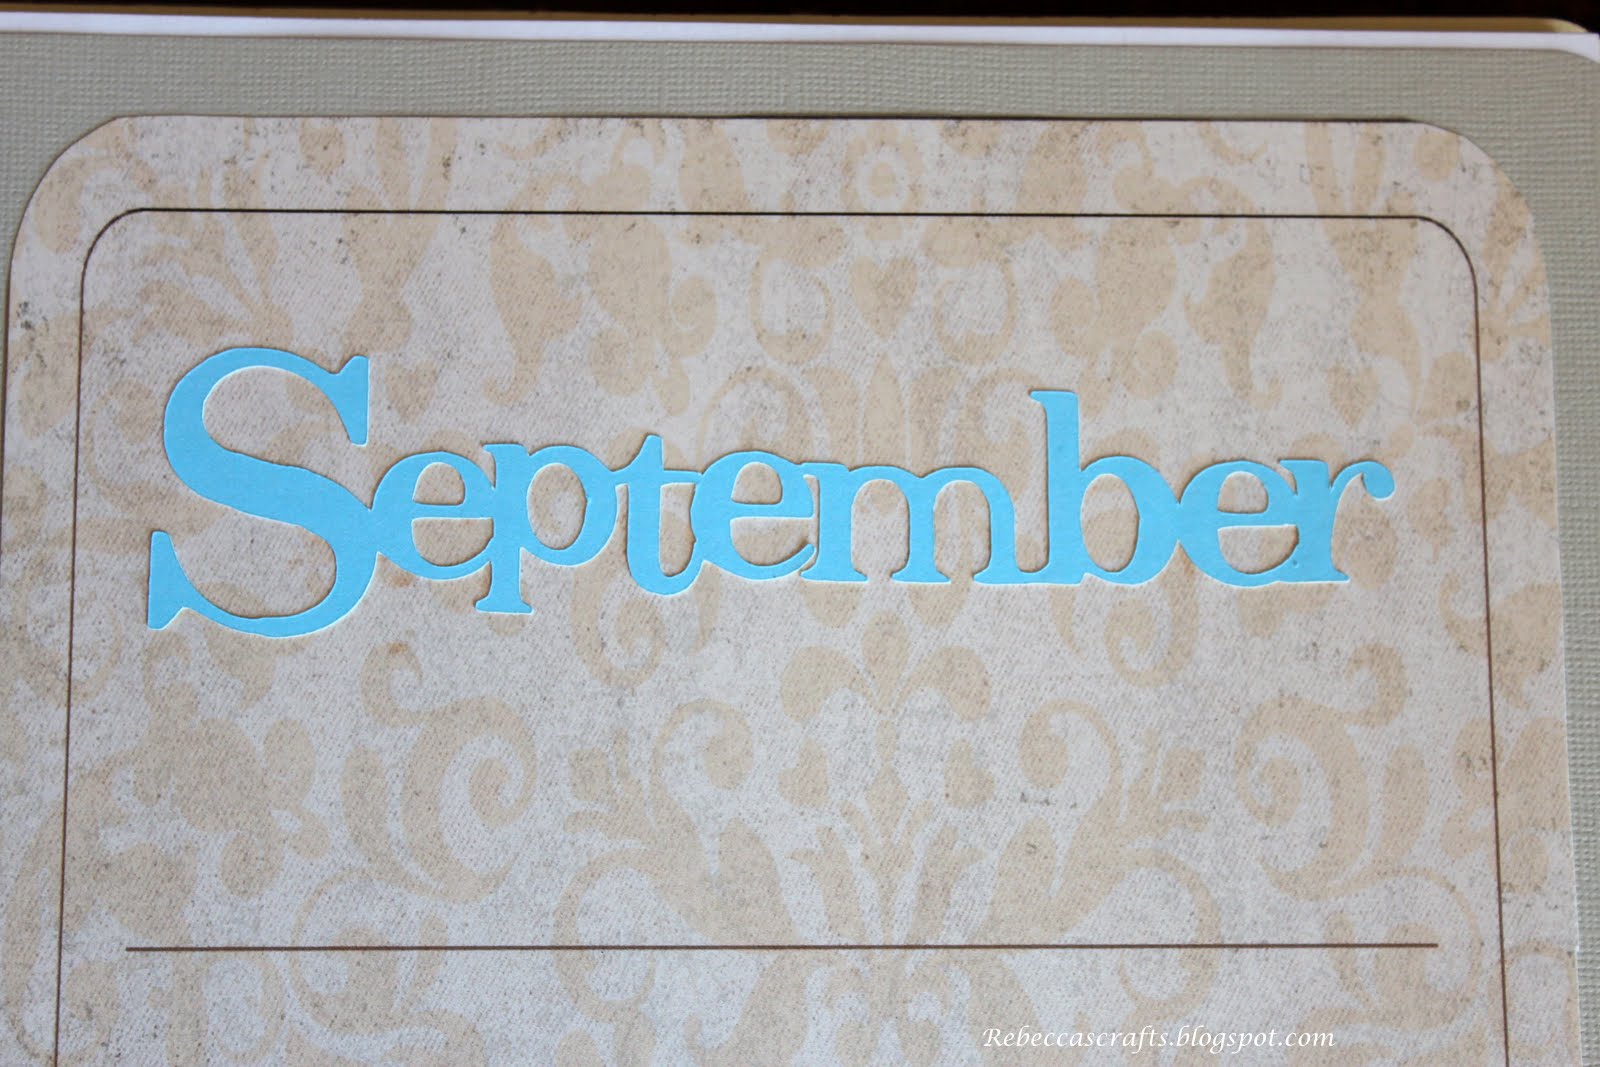
The month titles were made using the Cricut Craft Room and Kate's ABC's cartridge.  I made the first letter bigger than the rest of the letters and then welded them together to create one cut.  I also used the Imagine, so that I could match the colors.  The scalloped circles for the divider tabs were done using the free Craft Room Basics digital cart.  I used the Bind-it-all to bind the book.  An interesting tidbit is that I used We R Memory Keepers Cinch O-wire.  So you can use both in the Bind-it-all.


Planner Recipe:

  • Planner Pages - http://www.infarrantlycreative.net/2012/02/free-printable-blogplanner.html
  • Chipboard for covers cut to 11.5" x 9"
  • Cover paper from Colorbok English Moss overlay stack
  • Inner-cover art from Cricut Imagine More cartridge cut at 10"
  • Divider art from Cricut Imagine More cartridge cut at 10"
  • Scalloped tab circles from Craft Room Basics cut at 1"
  • Title text from Kate's ABC's cut at 1.8" and 1.25"
  • Month text from Kate's ABC's cut at 1.5" and 1"
  • Rosette from DCWV Fabric paper line
  • Twine from The Twinery


So that is that.  I hope I have inspired you to create your own planners for whatever purpose because I love looking at my personalized planner that didn't come off a store shelf.  Have a wonderful evening.