Hi all I hope that this holiday season has been treating you well. It is that time of year to look back on the past year and reflect on all the moments of the year. I feel blessed to think about all the great times I have had with my family and friends. All in all this has been a great year, I even hit my primary weight goal!!!!
I decided to play along with the theme of favorite project of the year. I have done many more than was on my blog as it has only been up for six months. But I decided to pick the goodie bag tags I did for my preschoolers Halloween party. The link to the original post is here.
I have submitted this project for the Cooking with Cricut Challenge.
I hope that you have enjoyed my projects over the past six months. I will have many more to come as I can finally post my Christmas projects. I didn't want to post them before they were given as gifts so that nobody's surprise was ruined.
I hope each and every one of you have had a fantastic year and wish you all the best health and happiness in the New Year!!!
Showing posts with label Halloween. Show all posts
Wednesday, December 28, 2011
Monday, October 31, 2011
Halloween Treats
Happy Halloween everyone!!! I hope yours is not so scary but very sweet. I have a quick project to share with you today. My daughters Halloween party at school was today and I signed up to make the edible treats for the goodie bags. I decided to make cake pops. Of course I got this idea a long time ago from Bakerella. They are super easy to make, just go on over to her site to learn how. I made orange and purple ones. I also had to include a cute tag. Here are the pics.
The tag base is from Tags, Bags, Boxes and More on the Gypsy cut at 2.75" x 4". The cute little ghost is from Simply Charmed cut at 2.0". The sentiment is a stamp from the dollar bin at Michael's. I have decided to enter this in to the weekly challenge over at Bitten by the Bug 2. The challenge was to use the ghost from Paper Doll Dress Ups but I don't own that cart, so used this cute guy instead. Hope you enjoy and have a safe Halloween.
Friday, October 21, 2011
My Guest Post for You Had Me At Craft
Hi all
So here is my exciting news. I applied to be a guest designer for Alex over at You Had Me at Craft and she picked me!!!! Please stop by her blog and see all of her fantastic inspiration. So here is the project that I did as well as the instructions and lessons learned for the project.
Today I have done some T-shirts for you all. They are Halloween T-shirts to go with the upcoming holiday and so that I could have something to wear when I take my girls trick-or-treating this year.
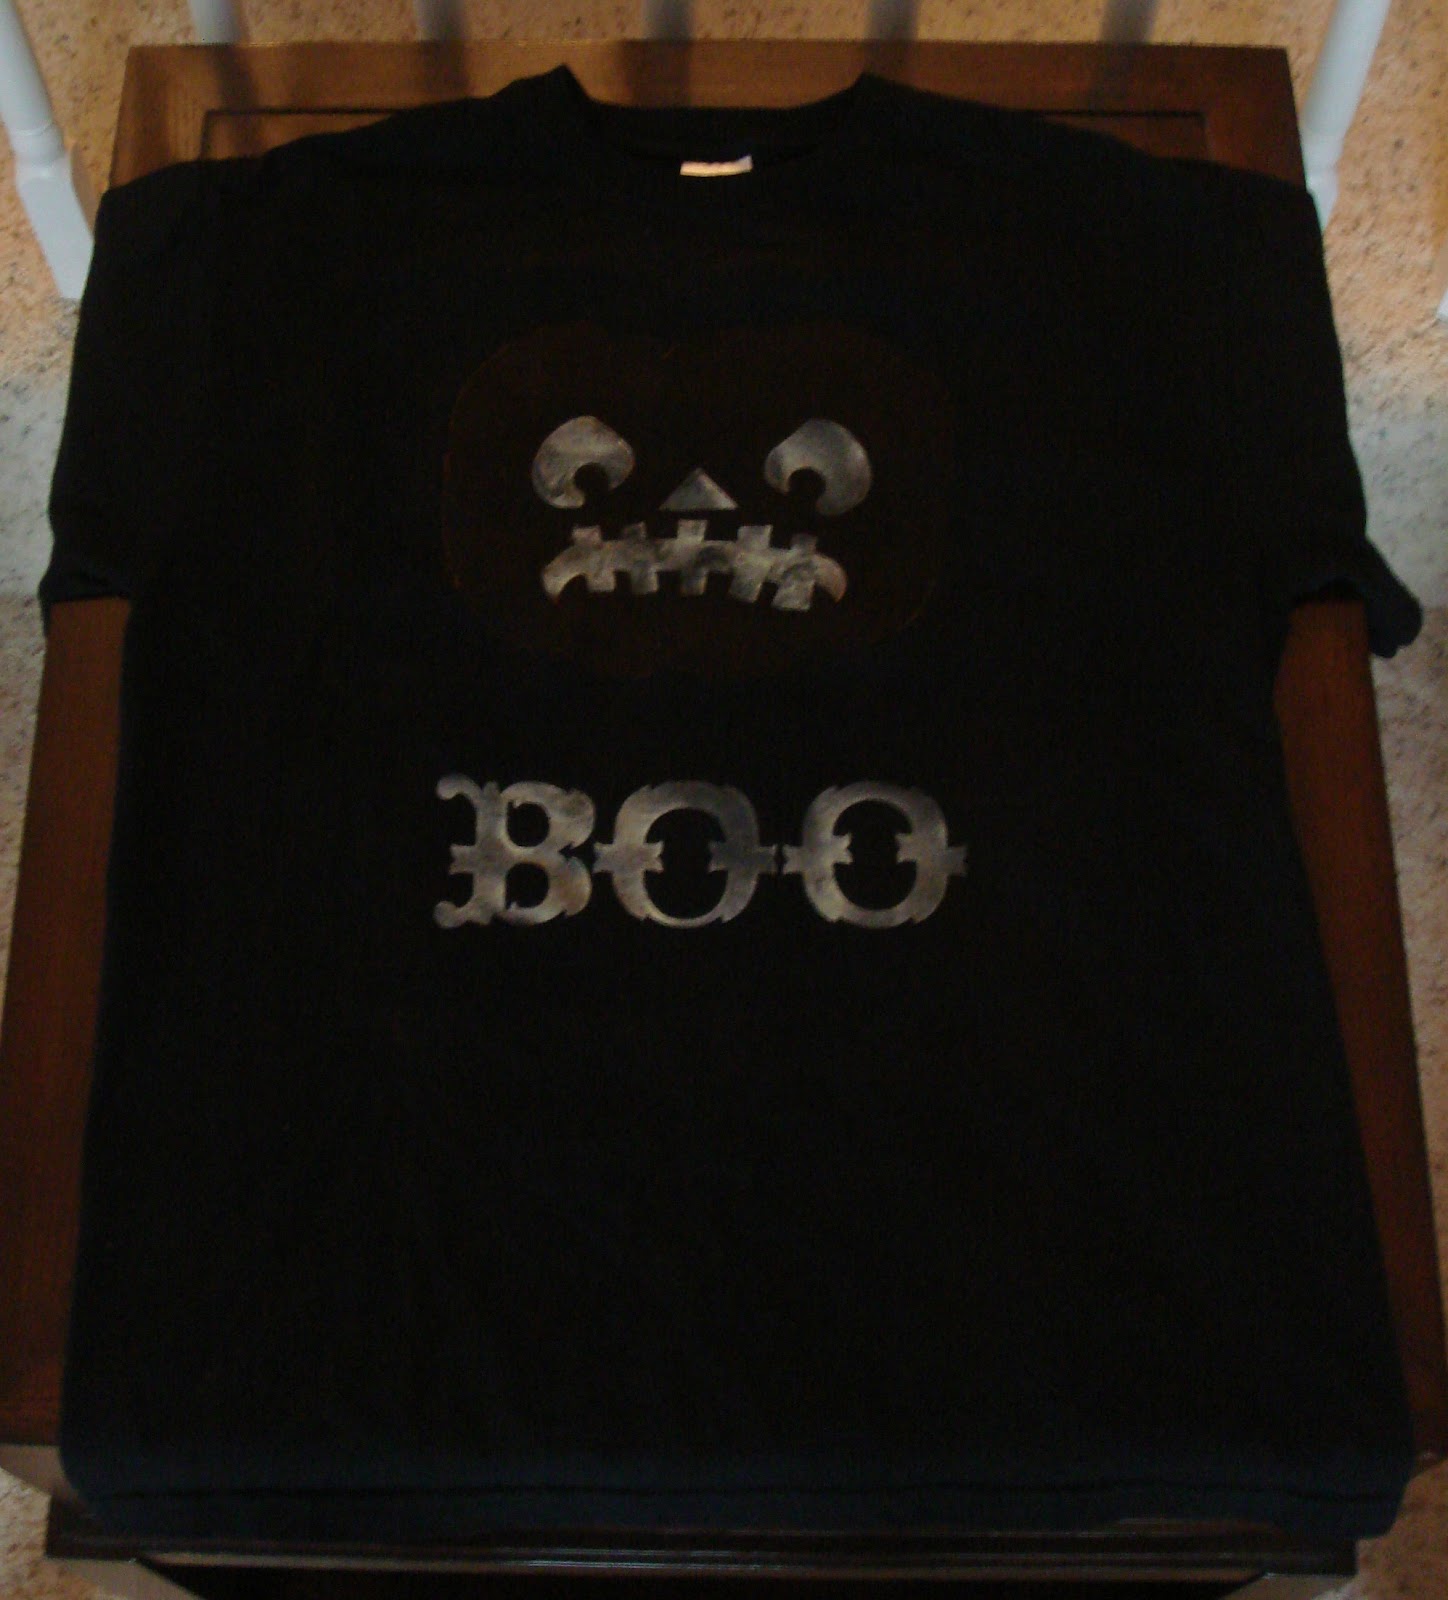
This first T-shirt is a scary one. The images are cut from the Happy Hauntings cartridge. I used neon orange fabric spray paint for the scary pumpkin. The cool thing about this shirt is that for the face and word I used glow-in-the-dark fabric spray paint. In the dark, you can really only see the face and word. One thing I did learn is that I don't like the spray fabric paint. It is hard to control where it goes and rather drippy. Lessons learned!!!
This next shirt is an homage to my love of wine!! The wine glass was cut from the Simply Charmed cartridge and the text was from the Happy Hauntings cartridge. I used regular green fabric paint for the wine glass. Another cool feature is that the wine and the text were done with glow-in-the-dark purple fabric paint. It really glows well, although I couldn't get a good picture to show you.
This last shirt was done using some cool iridescent orange paint and standard black paint. Both images are again from the Happy Hauntings cartridge.
And know on to the supplies and instructions.
Supplies Needed:
1. Freezer paper: I use Reynolds brand from my local grocery store
2. Cotton T-shirts. Pre-wash the shirts before proceeding with the project
3. Fabric pant
4. Foam brushes
How To:
1. Select an image to cut. I used my Cricut to cut most of the images from the Happy Hauntings cartridge. When you cut the freezer paper, place the paper non-glossy side down on the mat. If you are cutting an image that is not symmetrical you will need to flip it so that you are cutting the mirror image. I did this using my Gypsy and I think you can do this in the Craft Room. Really you only need to do this for words as images will work in either direction.
2. After removing the freezer paper from the mat (you will be using the outline of the image not the actual cut pieces), break out the iron and ironing board. Place the glossy side down on the fabric and iron on the highest setting that does not have steam. It should only take a few minutes. You will know when it is done when the inside edges don't lift up easily. Allow it to cool and then test the edges to see if you need to go over it again.
3. Choose your paint colors and using a foam paint brush apply the paint to the shirt inside the stencil. It works best if you brush from the edge of the stencil to the inside to ensure a clean line.
4. Let dry 3-4 hours or overnight for best results and then pull the freezer paper off the fabric.
Thanks for stopping by and checking out my T-shirts. Happy Halloween everyone.
So here is my exciting news. I applied to be a guest designer for Alex over at You Had Me at Craft and she picked me!!!! Please stop by her blog and see all of her fantastic inspiration. So here is the project that I did as well as the instructions and lessons learned for the project.
Today I have done some T-shirts for you all. They are Halloween T-shirts to go with the upcoming holiday and so that I could have something to wear when I take my girls trick-or-treating this year.
This first T-shirt is a scary one. The images are cut from the Happy Hauntings cartridge. I used neon orange fabric spray paint for the scary pumpkin. The cool thing about this shirt is that for the face and word I used glow-in-the-dark fabric spray paint. In the dark, you can really only see the face and word. One thing I did learn is that I don't like the spray fabric paint. It is hard to control where it goes and rather drippy. Lessons learned!!!
This next shirt is an homage to my love of wine!! The wine glass was cut from the Simply Charmed cartridge and the text was from the Happy Hauntings cartridge. I used regular green fabric paint for the wine glass. Another cool feature is that the wine and the text were done with glow-in-the-dark purple fabric paint. It really glows well, although I couldn't get a good picture to show you.
This last shirt was done using some cool iridescent orange paint and standard black paint. Both images are again from the Happy Hauntings cartridge.
And know on to the supplies and instructions.
Supplies Needed:
1. Freezer paper: I use Reynolds brand from my local grocery store
2. Cotton T-shirts. Pre-wash the shirts before proceeding with the project
3. Fabric pant
4. Foam brushes
How To:
1. Select an image to cut. I used my Cricut to cut most of the images from the Happy Hauntings cartridge. When you cut the freezer paper, place the paper non-glossy side down on the mat. If you are cutting an image that is not symmetrical you will need to flip it so that you are cutting the mirror image. I did this using my Gypsy and I think you can do this in the Craft Room. Really you only need to do this for words as images will work in either direction.
2. After removing the freezer paper from the mat (you will be using the outline of the image not the actual cut pieces), break out the iron and ironing board. Place the glossy side down on the fabric and iron on the highest setting that does not have steam. It should only take a few minutes. You will know when it is done when the inside edges don't lift up easily. Allow it to cool and then test the edges to see if you need to go over it again.
3. Choose your paint colors and using a foam paint brush apply the paint to the shirt inside the stencil. It works best if you brush from the edge of the stencil to the inside to ensure a clean line.
4. Let dry 3-4 hours or overnight for best results and then pull the freezer paper off the fabric.
Thanks for stopping by and checking out my T-shirts. Happy Halloween everyone.
Subscribe to:
Posts (Atom)