Hi all
We are still here in sunny Florida. It is actually cooler here than back home so I am glad we are down here this week. It is still hot but it helps that my parents have a pool and we are only 10 minutes from the beach. That is were went ventured today. The kids had a blast. The only problem is that my 2yo does not like being dirty so every time she would get sand on her hands we had to run down to the water to clean them off. In some ways it is really nice having a child that does not like to be dirty but in others it can be a hassle. Here is a picture of the little ones at the beach.
So the project I have this week is a Father's Day project that I didn't get to post. I got the idea off of Pinterest, one of my time sucks. The link I had was actually and etsy shop that was selling it and I thought I could whip that out in about five minutes with my Cricut. So here it is.
This is an 8.5" x 11" sheet of white card stock. The tree is cut from the Ultimate Creative Sampler at 8.5". I then cut all the leaves off the tree to have only the trunk and branches. The text below is from Plantin Schoolbook cut at 0.8" Then I just used kids paint in red and yellow to do their hand prints. The one thing I did learn in this project is that I should double up on the card stock before doing the hand-prints. There is a little crease in the paper from how the paint dried. My husband absolutely loved this gift and plans to hang it in his office. Thanks for stopping by and hope you have a great week.
Showing posts with label Plantin Schoolbook. Show all posts
Monday, July 2, 2012
Thursday, June 28, 2012
Elmo Birthday T-Shirt with Cricut
Hi all
Hope the week is finding you well. We are still here with family. It is amazing how much more time I have for blogging when I don't have my craft room to work in. But that just means I get to share more of my projects with you. So today I have a T-shirt I did for my husband's co-worker. Her little boy is turning 1 soon and she wanted an Elmo birthday t-shirt for him. So here is what I came up with:
So for this T-shirt I used a product that I am new to, Expressions Vinyl. I ordered all the colors I needed of the heat transfer vinyl. After watching some videos on their website, I quickly learned how to work with it and the Cricut. I learned that the key is not to cut through the plastic transfer backing, only the vinyl. This was done by setting my blade to 2, speed to medium and pressure to medium. It was really easy to work with and I think this is my favorite t-shirt medium so far. The one trick also is that you need to flip all your images. This is easily done in CCR though. Once the images are cut you just use your iron to transfer the vinyl to the t-shirt. Here are the details on the cuts.
T-Shirt Recipe:
- Font from Elmo's Party cut at 1" and 1.5"
- Font from Plantin Schoolbook cut at 1.6"
- Elmo face from Elmo's Party cut at 5.5"
- Streamers from Elmo's Party cut at 2"
- Expressions Vinyl
Monday, April 23, 2012
Scrapbooking with the Cricut
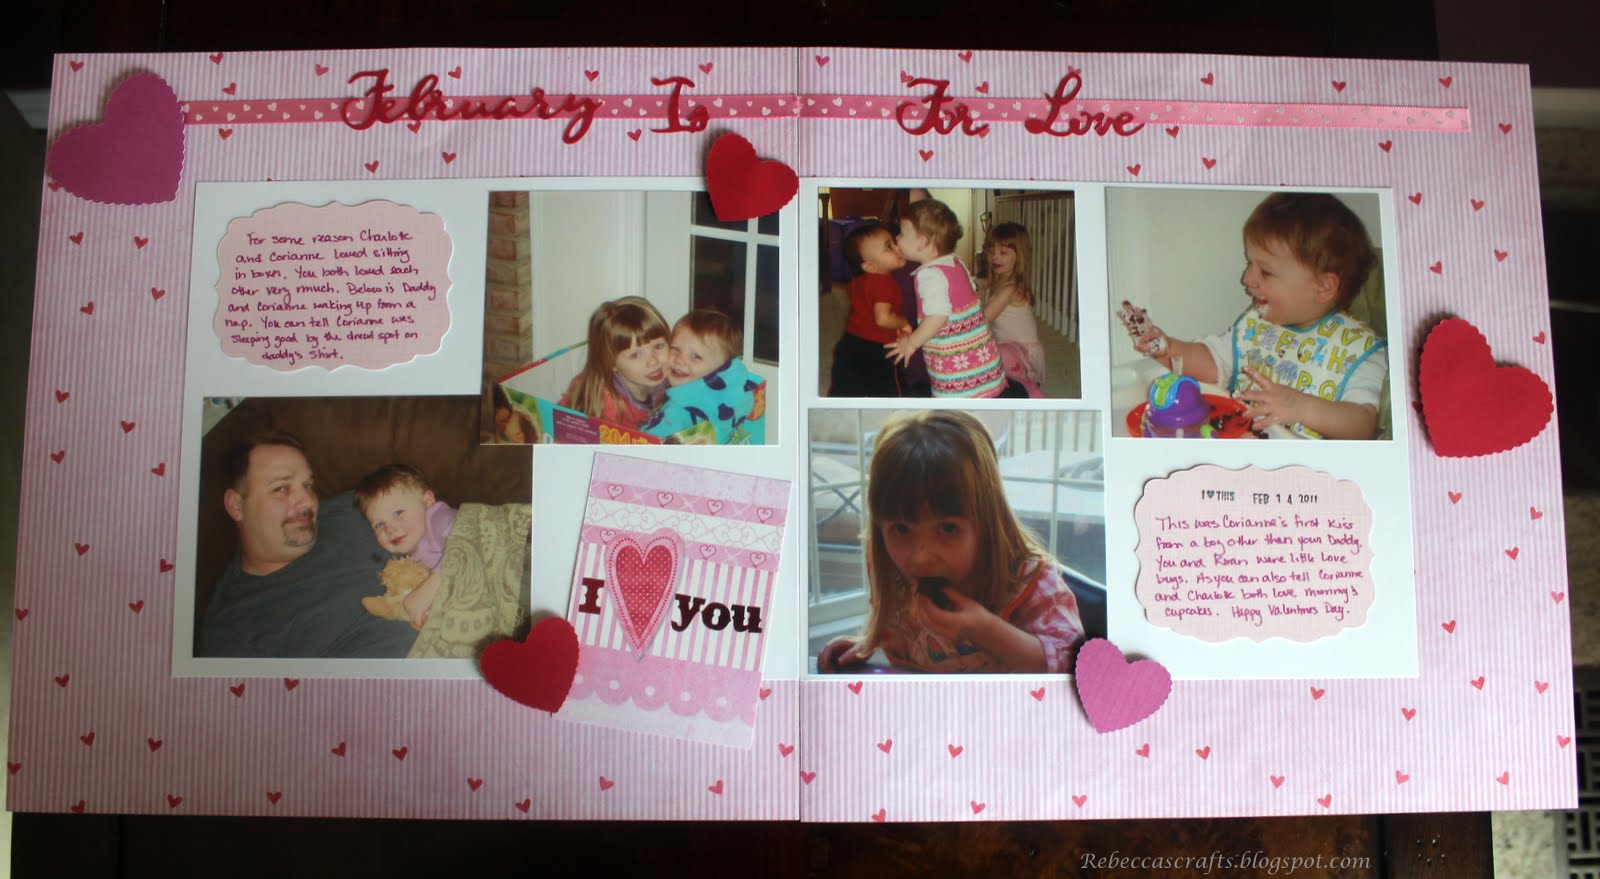
Hi all, hope you have had a good weekend. I had a pretty good one, spent the evenings getting some much needed scrapbooking done. I love scrapping but always have a hard time getting started. Well this weekend I decided I was going to get started on our 2011 family album. I have done first year albums for my girls but never a family album. I though the first couple layouts came out pretty good. I am not going to list recipes for the pages only the Cricut cartridges I used. So here we go.
Cricut Cartridges Used:
So there they are. I think I got a pretty good start and am going to try and dedicate one night a week to scrapping until I get the album done. I am now going to start working on some projects for Teachers Gifts. Not sure what I am going to do yet. If you have any ideas for Teacher Appreciation week I would love to hear about them. Have a great week.
Cricut Cartridges Used:
- Plantin Schoolbook
- Kate's ABCs
- Stretch Your Imagination
- Cricut Craft Room Basics
- Gypsy Font
So there they are. I think I got a pretty good start and am going to try and dedicate one night a week to scrapping until I get the album done. I am now going to start working on some projects for Teachers Gifts. Not sure what I am going to do yet. If you have any ideas for Teacher Appreciation week I would love to hear about them. Have a great week.
Sunday, March 11, 2012
St Patty's Day T-Shirts and Video
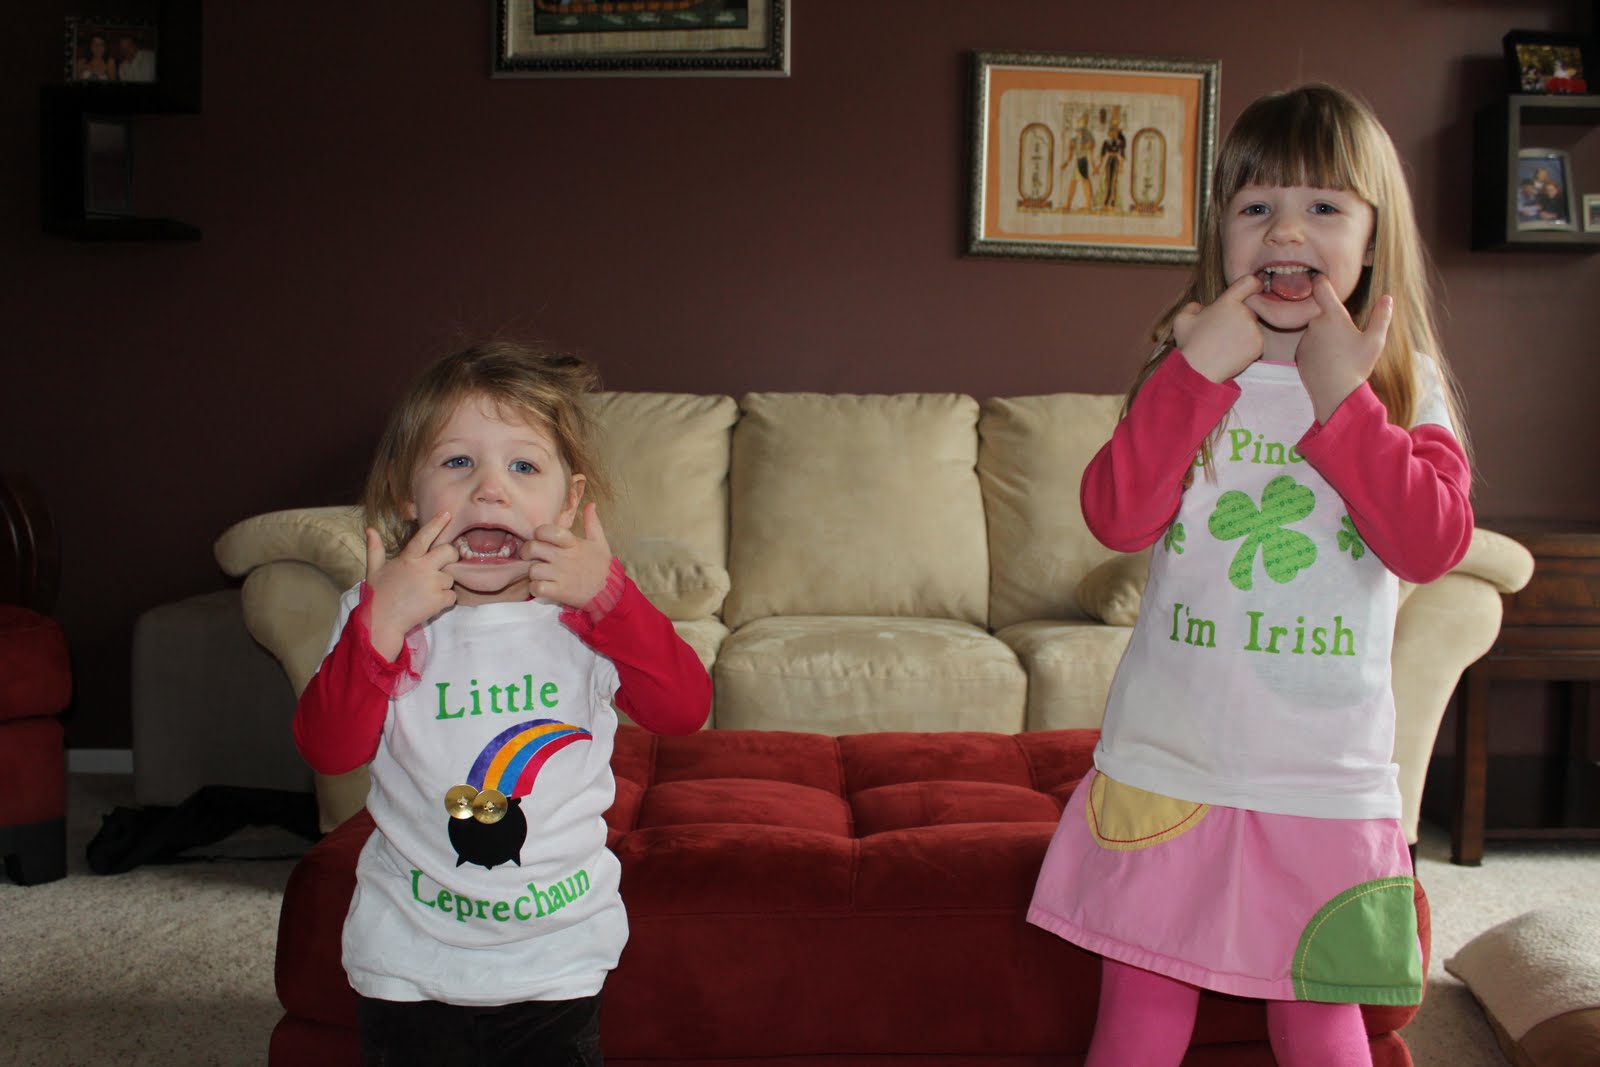
Good evening all. Hope you have had a great weekend. We had a pretty low key one here. Just hanging out enjoying the nice weather. So my project for today is some T-shirts I made for my girls. I really think they can out super cute and can't wait for them to wear them for St Patrick's Day. These shirts are different from ones I have done in the past because I used fabric instead of paint for the decorations. I used my Cricut to cut the fabric and learned a lot in the process. I also made a video for you to share some of my tips. Here are the shirts.
Didn't they come out great. I love the gold buttons on the pot of gold. Here is the video and I will put a recipe at the end.
T-Shrirt Recipe:
I have decided to enter this project in two challenges this week.
I will leave you will a picture of my cuties in their t-shirts. Have a great week!!
Didn't they come out great. I love the gold buttons on the pot of gold. Here is the video and I will put a recipe at the end.
T-Shrirt Recipe:
- T-shirts: I use regular t-shirts from Target instead of the craft store because they are softer and have more shape
- Heat n' Bond
- Fabric and embellishments from fabric store
- Ironing Board and Iron
- Shamrocks from Cricut Digital cart St Patrick's Day cut at 3.5" and 1.3"
- Rainbow and Pot of gold from Simply Charmed cut at 2.4"
- Text from Plantin Schoolbook Shadow cut at 1.12"
I have decided to enter this project in two challenges this week.
I will leave you will a picture of my cuties in their t-shirts. Have a great week!!
Tuesday, February 21, 2012
Okay I know Valentine's Day is Over
Good evening all. As the title says I know Valentine's Day is over but I do have a few more related crafts to show you. I mentioned in my last post that I would show how I used the treat toppers and so here they are.
I made 12 of these great Red Velvet Whoopie Pies for the kids goody bags. I got the baking inspiration off of Pinterest. The actual recipe site is here. I changed up her filling recipe a bit. Her cream cheese filling was absolutely delicious on its own but I thought that for a whoopie pie it needed to be less dense. So I made some whipped cream and folded it into the cream cheese filling, This made the whole desert have a lighter feel to it. They were great and I may make them every year.
Here is a pic of my girls showing off their Valentine's from mommy.
And on a final note I wanted to post the Valentine's Card I made for my 2yo class party.
I had to make 13 of these cards so I kept them pretty simple, but I do love the handwritten sentiment.
Card Recipe:
* 3" x 3" red card base
* Heart from Plantin Schoolbook cut at 2.5"
* Bee from Create-a-critter cut at 2"
* Ribbon from Jo-ann's
* Frosted Lace Stickles
* Embossing from Simply charmed Companion set
Hope you enjoy. I also wanted to mention a great score I found at Tuesday Mornings. I walked in there the other day just to see what they had in their crafting section and I saw a Zutter Bind-it-all V2. The set came with the wire and some chipboard for a price of ..... $25.10!!!! I could not pass this up. I already have a project lined up to use it with. Hope you have a wonderful evening.
I made 12 of these great Red Velvet Whoopie Pies for the kids goody bags. I got the baking inspiration off of Pinterest. The actual recipe site is here. I changed up her filling recipe a bit. Her cream cheese filling was absolutely delicious on its own but I thought that for a whoopie pie it needed to be less dense. So I made some whipped cream and folded it into the cream cheese filling, This made the whole desert have a lighter feel to it. They were great and I may make them every year.
Here is a pic of my girls showing off their Valentine's from mommy.
And on a final note I wanted to post the Valentine's Card I made for my 2yo class party.
I had to make 13 of these cards so I kept them pretty simple, but I do love the handwritten sentiment.
Card Recipe:
* 3" x 3" red card base
* Heart from Plantin Schoolbook cut at 2.5"
* Bee from Create-a-critter cut at 2"
* Ribbon from Jo-ann's
* Frosted Lace Stickles
* Embossing from Simply charmed Companion set
Hope you enjoy. I also wanted to mention a great score I found at Tuesday Mornings. I walked in there the other day just to see what they had in their crafting section and I saw a Zutter Bind-it-all V2. The set came with the wire and some chipboard for a price of ..... $25.10!!!! I could not pass this up. I already have a project lined up to use it with. Hope you have a wonderful evening.
Saturday, February 4, 2012
Valentine's Card for Kids
Good evening. I have been working on Valentine's cards for my kiddos this week. It is only right around the corner!!! This is one of my favorite holidays because it is all about expressing your love. I decided to use a dimensional gate fold card that I haven't done before. I think the cards came out great and the kids are really going to love them. I also made a video showing how I created the cards. Here they are.
Here are some pics of the other card I made as well.
Card Recipe and Supplies:
Owl Card:
* Start with a 5" x 12" piece of card stock - K & Company
* Start at one side and score at 2" 4" 8" and 10"
* Should have an inside card dimension of 5" x 4" with two 2" folded flaps
* Elegant Edges Hearts1 oblong feature cut at 4" - then cut in half
* Plantin Schoolbook heart cut at about 1"
* Create-a-Critter Owl cut at 3"
* Ribbon from Jo-anns
* Crop-a-dile used for the eye-lets
* Cotton Candy Stickles
Love Bug Card:
* Start with a 5" x 12" piece of card stock - K & Company
* Start at one side and score at 2" 4" 8" and 10"
* Should have an inside card dimension of 5" x 4" with two 2" folded flaps
* Elegant Edges Hearts 2 oblong feature cut at 4" - then cut in half
* Simply Charmed Love Bug 2 cut at 2.75"
* Simply Charmed Love Bug Sentiment cut at 1"
* Ribbon from Jo-anns
* Crop-a-dile used for eye-lets
* Cotton Candy Stickles
I have also entered this card into the Anything Goes challenge over at My Craft Spot.
Have a great weekend!!!
Here are some pics of the other card I made as well.
Card Recipe and Supplies:
Owl Card:
* Start with a 5" x 12" piece of card stock - K & Company
* Start at one side and score at 2" 4" 8" and 10"
* Should have an inside card dimension of 5" x 4" with two 2" folded flaps
* Elegant Edges Hearts1 oblong feature cut at 4" - then cut in half
* Plantin Schoolbook heart cut at about 1"
* Create-a-Critter Owl cut at 3"
* Ribbon from Jo-anns
* Crop-a-dile used for the eye-lets
* Cotton Candy Stickles
Love Bug Card:
* Start with a 5" x 12" piece of card stock - K & Company
* Start at one side and score at 2" 4" 8" and 10"
* Should have an inside card dimension of 5" x 4" with two 2" folded flaps
* Elegant Edges Hearts 2 oblong feature cut at 4" - then cut in half
* Simply Charmed Love Bug 2 cut at 2.75"
* Simply Charmed Love Bug Sentiment cut at 1"
* Ribbon from Jo-anns
* Crop-a-dile used for eye-lets
* Cotton Candy Stickles
I have also entered this card into the Anything Goes challenge over at My Craft Spot.
Have a great weekend!!!
Saturday, November 26, 2011
Advent Calendar and First Video
Hi all I hope you have had a fantastic Thanksgiving. I having been having alot of fun with my family, with way more fun to be had next week. So I have something exciting today. I made my very first video!!! Please no over the top laughter as it is my first video.
Anyhow I am going to share with you the Advent calendar that I made. I really love how it turned out and plan to use if for years to come. I got the idea here and made some simple changes that I think made it a little special. I have been using all of the inspiration floating around the blog-o-shpere and am really thankful for all the ideas.
So here is the calendar and video of how to make the pockets. The original author used library pockets but since I didn't have any of those lying around my video shows how I made them and then embellished them.
Recipe:
Anyhow I am going to share with you the Advent calendar that I made. I really love how it turned out and plan to use if for years to come. I got the idea here and made some simple changes that I think made it a little special. I have been using all of the inspiration floating around the blog-o-shpere and am really thankful for all the ideas.
So here is the calendar and video of how to make the pockets. The original author used library pockets but since I didn't have any of those lying around my video shows how I made them and then embellished them.
Recipe:
- For the pocket cut down a manilla file folder to 8" x 4" and score at 3.75". See the video for more instructions
- The base layer ornament is 2.77" x 3.75" from Simply Charmed
- Top layer ornament is 2.36" x 3.2" from Simply Charmed
- Numbers at 1.25" from Plantin Schoolbook
- Insert card base is 3.5" x 3" from Once Upon a Princess
- Insert card top layer is 3.10" x 2.30" from Once Upon a Princess
Subscribe to:
Posts (Atom)