Friday, December 30, 2011

Christmas Projects

Hi all

I wanted to share some projects that I did for Christmas.  I was furiously crafting up until the 23rd which is why I did not post much over the holidays.  Next year I will definitely start earlier, especially on my Christmas cards.  So the first project are our family Christmas cards.  This is the first year that I have done them all in house and wanted to make them as simple as possible.

It is a 6 inch by 5 inch card.  I used a snowflake embossing folder and maraschino twine from the twinery.  The reindeer is cut at 4 inches from the Christmas Cartridge that came with my Gypsy.  The stamps are from Recollections.


The second project is a tag I made for the cookie boxes I give to our post woman.  I try and bake yummy goodies to give to all the people that help us throughout the year and provide the services that make life easier.
After I made them I realized that they are a little big but I needed the space to write a nice note on the back.  The twine is from the Christmas pack at the twinery.  The gingerbread man is from Stretch your Imagination cut at 3 inches.  I actually used the Craft Room and my Cricut Imagine so that I could just print the colors and cut all at the same time.  I thought they came out pretty cute.


The last project I have is a decoration I made to decorate the table for the Christmas breakfast I made for my girls school.  I have decided that I do not like to buy teacher's gifts because they seem to get the same things so I make them all a hot breakfast instead.
This is just a piece of Christmas card stock for the background with the text cut from a Cricut Craft Room exclusive.  The exclusive cartridge is Teresa Collins Christmas Collage.  It is a digital cartridge that you can buy from the Craft Room.  This was really simple to make and came out beautiful.  I gave it to the school director as a gift and think I will make something similar for myself.
I hope that you have enjoyed these projects and maybe gives you some inspiration for next year.  My goal is to start my Christmas crafting alot earlier, like maybe July!!!  Have a Happy New Year. 

Wednesday, December 28, 2011

Favorite Project of 2011

Hi all I hope that this holiday season has been treating you well.  It is that time of year to look back on the past year and reflect on all the moments of the year.   I feel blessed to think about all the great times I have had with my family and friends.  All in all this has been a great year, I even hit my primary weight goal!!!!

I decided to play along with the theme of favorite project of the year.  I have done many more than was on my blog as it has only been up for six months.  But I decided to pick the goodie bag tags I did for my preschoolers Halloween party.  The link to the original post is here.

I have submitted this project for the Cooking with Cricut Challenge.

I hope that you have enjoyed my projects over the past six months.  I will have many more to come as I can finally post my Christmas projects.  I didn't want to post them before they were given as gifts so that nobody's surprise was ruined.

I hope each and every one of you have had a fantastic year and wish you all the best health and happiness in the New Year!!! 

Sunday, December 25, 2011

Merry Christmas

I wanted to wish you all a very Merry Christmas and hope you had a wonderful holiday with family and friends.

Happy Holidays!!!!

Tuesday, December 13, 2011

Hello and Santa Wishes

Hi all

It has been a while since I posted.  We went to Florida to visit family for Thanksgiving and then took the kids to Disney as a surprise.  It was so much fun!!!  The girls were loving meeting all the characters and being absolute princesses.  Here is a photo to show off a cute princess moment.

So now onto Santa's wishes.  We did our first letters to Santa this year and in my loving of crafts I had to whip up a quick really cute way to write Santa.


I made these really fast the night before and I hope that they get to Santa in time.  I really love the reindeer.  I would have put all nine on each sheet if there was space!!!  These reindeer are from the Create a Critter cartridge and the lettering is from Birthday Bash.

I have alot more projects coming up as I made some Christmas gifts and just finished our in-house Christmas cards!!!

I hope you enjoy and all your Santa Wishes come true!!!

Saturday, November 26, 2011

Advent Calendar and First Video

Hi all I hope you have had a fantastic Thanksgiving.  I having been having alot of fun with my family, with way more fun to be had next week.  So I have something exciting today.  I made my very first video!!!  Please no over the top laughter as it is my first video.
Anyhow I am going to share with you the Advent calendar that I made.  I really love how it turned out and plan to use if for years to come.  I got the idea here and made some simple changes that I think made it a little special.  I have been using all of the inspiration floating around the blog-o-shpere and am really thankful for all the ideas.
So here is the calendar and video of how to make the pockets.  The original author used library pockets but since I didn't have any of those lying around my video shows how I made them and then embellished them.


Recipe:
  • For the pocket cut down a manilla file folder to 8" x 4" and score at 3.75".  See the video for more instructions
  • The base layer ornament is 2.77" x 3.75" from Simply Charmed
  • Top layer ornament is 2.36" x 3.2" from Simply Charmed
  • Numbers at 1.25" from Plantin Schoolbook
  • Insert card base is 3.5" x 3" from Once Upon a Princess
  • Insert card top layer is 3.10" x 2.30" from Once Upon a Princess
I hope you enjoy and have given you more ideas for a DIY Advent calendar.

Friday, November 18, 2011

Thanksgiving Card

Hi all

I hope you are having a great week and not too stressed out about the upcoming holidays.  We are getting ready here.  So today I have a card that I did for my brother.  He is in Afghanistan and I wanted to send him something to remind him how much we love him and miss him during this holiday.  I made him cookies and a cute card.


I made this card using my Imagine and the Cricut Craft Room.  This is the first time that I have used my new Imagine to make an entire project, well except the ribbon.  I only used white paper as the Imagine allows you to put color to any image, even the standard cartridge images.  It was really fun.  I did have a little fuss with the Craft Room, but I am working through those issues.  I am sure that they are my issues!!!  Anyhow I hope you enjoy and have a fantastic Thanksgiving.


Card Recipe:

  • Card base is 5" by 6" and used a paper patter from the Imagine More Cartridge
  • Turkey cut at 4" from the Create a Critter cartridge
  • Sentiment cut at 1.5" from Simply Charmed
  • Golden Rod Stickles (After the fact I also added stickles to the top hat but never got a picture of it!!)
I have also entered this card over at the Fantabulous Cricut blog for their Challenge Me Monday Harvest Blessings.  


Thursday, November 10, 2011

Cricut Craft Room Works!!!!

Hi all
So I have had access to the new Cricut Craft Room for a couple months now, but have never been able to cut with it.  I work with a Mac and that has primarily been the issue as the update process would continually get stuck.  After scouring the Cricut message boards to no avail I gave up on cutting with the Craft Room.  I would use the online version to design and then export the files to my Gypsy for cutting.  Well I think that yesterday they finally announced the Craft Room was open for everybody to use and I decided to go ahead and give it another try.  To my surprise there was an update available for the Mac and when I did this and began updating my Expression it actually worked!!!  I just made my first cut after being able to design on my computer. 

I also used the free Craft Room Essentials images that are available for everyone to use.  So just wanted to share because I have been excited about this for a while and am really stoked it actually worked. 

Monday, October 31, 2011

Halloween Treats

Happy Halloween everyone!!!  I hope yours is not so scary but very sweet.  I have a quick project to share with you today.  My daughters Halloween party at school was today and I signed up to make the edible treats for the goodie bags.  I decided to make cake pops.  Of course I got this idea a long time ago from Bakerella.  They are super easy to make, just go on over to her site to learn how.  I made orange and purple ones.  I also had to include a cute tag.  Here are the pics. 


The tag base is from Tags, Bags, Boxes and More on the Gypsy cut at 2.75" x 4".  The cute little ghost is from Simply Charmed cut at 2.0".  The sentiment is a stamp from the dollar bin at Michael's.  I have decided to enter this in to the weekly challenge over at Bitten by the Bug 2.  The challenge was to use the ghost from Paper Doll Dress Ups but I don't own that cart, so used this cute guy instead.  Hope you enjoy and have a safe Halloween. 

Saturday, October 29, 2011

My Creative Time Design Team Call

Hi all, I came across the blog My Creative Time and saw that Emma was having her first design team call and thought maybe I will enter.  Well after much thought I came up with a project that I had been thinking about doing for a while, something 3-D.  I decided that I would make a purse that could hold a gift card for a birthday present.  I really had a great time putting this together and it was easier than I thought it would be.  So here it is:


The Recipe:

  • The purse is the flower9 purse cut from Forever Young cut at 6".
  • I decorated the purse before assembling it so that the glue would dry flat.
  • I just used random embellishments from my stash and a little bit of silver stickles.
  • The sentiment is My Pink Stamper Family and Friends (sorry Emma I don't own any of your stamps, YET!!)
I hope you enjoy this and inspires you to do something 3-D.  And wish me luck with the DT call.  Thanks Emma for the opportunity and all the fabulous inspirations!!

Friday, October 28, 2011

Birthday Madness - Final Chapter

Hi all,  I hope you are having a wonderful Friday.  We are finally done with birthday month here after celebrating our little girl's actual birthday last weekend.  And I did a few things for her.  Of course I made her a birthday banner and a card, but the most exciting thing is that I actually got her first year scrapbook done!!!  This is really awesome to me because I didn't get Charlotte's first year done until she was three!!!  So without further adieu here are the pics.  I am not including any recipes with these because I used so many different carts that honestly I can't really remember them all. 
Isn't she a cutie!!!


Friday, October 21, 2011

My Guest Post for You Had Me At Craft

Hi all

So here is my exciting news.  I applied to be a guest designer for Alex over at You Had Me at Craft and she picked me!!!!  Please stop by her blog and see all of her fantastic inspiration.  So here is the project that I did as well as the instructions and lessons learned for the project.

Today I have done some T-shirts for you all.  They are Halloween T-shirts to go with the upcoming holiday and so that I could have something to wear when I take my girls trick-or-treating this year.

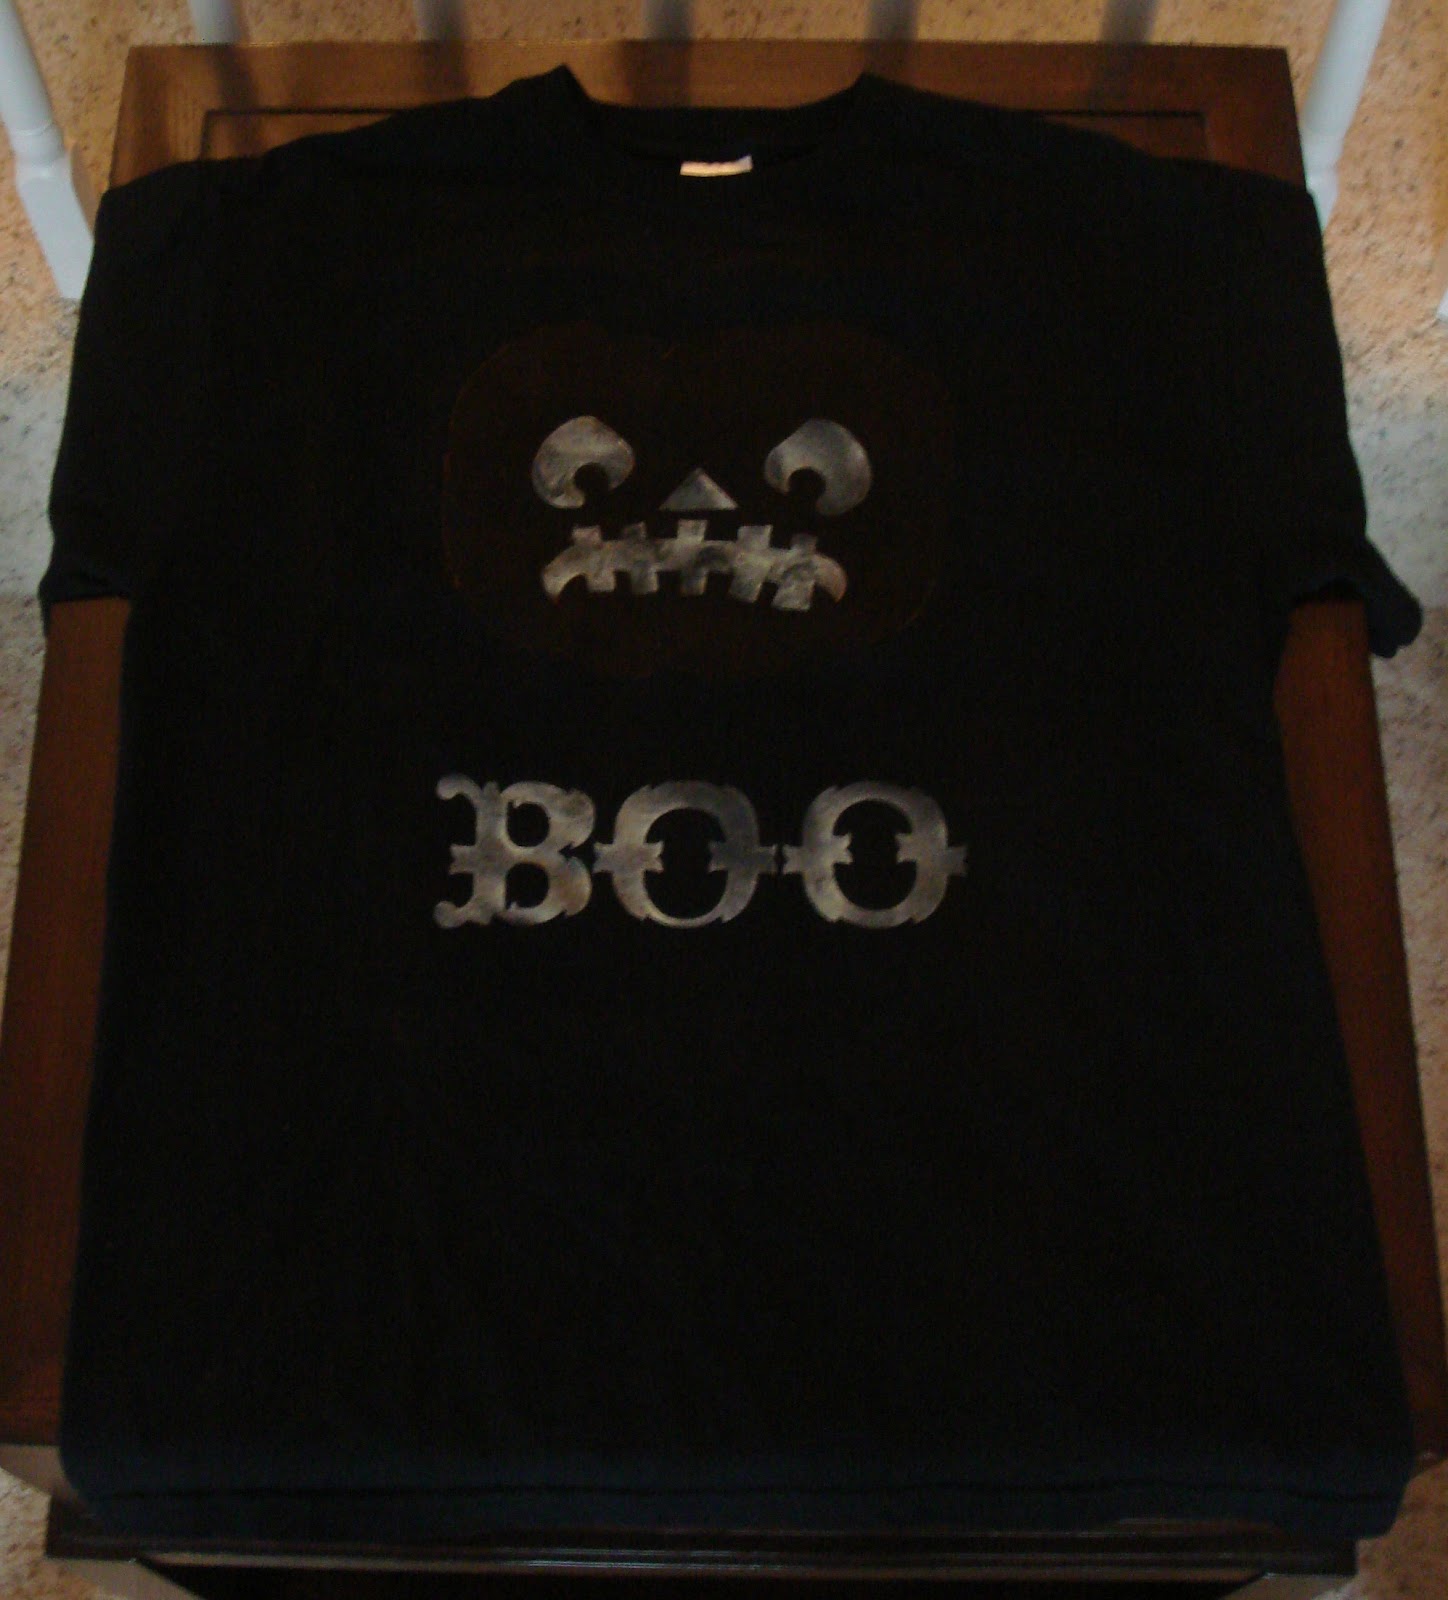
This first T-shirt is a scary one.  The images are cut from the Happy Hauntings cartridge.  I used neon orange fabric spray paint for the scary pumpkin.  The cool thing about this shirt is that for the face and word I used glow-in-the-dark fabric spray paint.  In the dark, you can really only see the face and word.  One thing I did learn is that I don't like the spray fabric paint.  It is hard to control where it goes and rather drippy.  Lessons learned!!!

This next shirt is an homage to my love of wine!!  The wine glass was cut from the Simply Charmed cartridge and the text was from the Happy Hauntings cartridge.  I used regular green fabric paint for the wine glass.  Another cool feature is that the wine and the text were done with glow-in-the-dark purple fabric paint.  It really glows well, although I couldn't get a good picture to show you.

This last shirt was done using some cool iridescent orange paint and standard black paint.  Both images are again from the Happy Hauntings cartridge.

And know on to the supplies and instructions.

Supplies Needed:
1.  Freezer paper:  I use Reynolds brand from my local grocery store
2.  Cotton T-shirts.  Pre-wash the shirts before proceeding with the project
3.  Fabric pant
4.  Foam brushes

How To:

1.  Select an image to cut.  I used my Cricut to cut most of the images from the Happy Hauntings cartridge.  When you cut the freezer paper, place the paper non-glossy side down on the mat.  If you are cutting an image that is not symmetrical you will need to flip it so that you are cutting the mirror image.  I did this using my Gypsy and I think you can do this in the Craft Room.  Really you only need to do this for words as images will work in either direction.

2.  After removing the freezer paper from the mat (you will be using the outline of the image not the actual cut pieces), break out the iron and ironing board.  Place the glossy side down on the fabric and iron on the highest setting that does not have steam.  It should only take a few minutes.  You will know when it is done when the inside edges don't lift up easily.  Allow it to cool and then test the edges to see if you need to go over it again.

3.  Choose your paint colors and using a foam paint brush apply the paint to the shirt inside the stencil.  It works best if you brush from the edge of the stencil to the inside to ensure a clean line. 

4.  Let dry 3-4 hours or overnight for best results and then pull the freezer paper off the fabric. 

Thanks for stopping by and checking out my T-shirts.  Happy Halloween everyone.

Thursday, October 20, 2011

Catching Up on Crafting

I am excited and honored to be Rebecca's first guest blogger. "Thank you Rebecca!!" We have been friends for many years and have recently been able to find to time to craft together. I have loved to do all sorts of craft projects since I was a kid, but since having kids myself it's been hard to find time for any projects other than helping the kids get good and messy. Thankfully for me, Rebecca is a trooper about bringing her Cricut anywhere and everywhere. I am posting 3 different projects today. The first 2 used Rebecca's trusty Cricut and the last one I an including only because I think it's a cool idea to use for a range of holidays and events.

Project 1:

Birthday party Invitations. I have 3 children - now ages 6, 4 & 3. And all of their birth dates are within 28 days of each other. So this year we had 1 big circus. I created these adorable invites with the help of Rebecca's Cricut! Embellishments included glitter and felt and well as a few stickers.


Project 2:
On our cabin trip that Rebecca mentioned over the Labor Day weekend - I also created a few Back to School notes for the kids. They loved the cards! Going back to school... well, not so much!


And Project 3:
My mother's 60th birthday is coming up and I thought and thought about what to do and I finally came up with a party idea: Patricia is 6tea . And it will be a tea party. I found a tea cup pattern online, then covered real tea bags with cute coordinating paper. Then told guests to please not bring gifts, but if they couldn't resist to please pick up a mis-matched tea cup and saucer for her - putting their name on the bottom - in the end she'll have a full set but also able to recall who each set is from. I wanted to include this card because the idea could be used for a traditional tea party, a Mother's Day card, Get Well card, and any of the "tea" birthdays (20, 30, 40, etc.) so it has name applications.


Well - I hope you like these projects - I'm hoping to get another invite to post some more projects in the future! :)

Wednesday, October 19, 2011

Birthday Madness - Part II

Hi all

So we have made it through the middle of the birthday madness month.  We had a party with family and friends to celebrate both of our girls birthdays'.  It was really fun because we went to the local fall festival and just had a blast going on all the slides and the hayride.  For their birthdays I made push-pop cakes. I got the idea from a blog I follow called Gourmet Mom on the Go.  The link to her post is here: http://www.gourmetmomonthego.com/2011/04/push-pop-cakes.html

Here are the ones that I created. 

These are made using mini pumpkin cupcakes and in between is orange cream cheese frosting.  They were so yummy.  Now you may be wondering about the fantastic stand that they are displayed in???  Well I told my husband how I wanted to display them and he did most of the work.  I made a flower template using my Cricut and the Create a Critter cartridge.  My husband then went to the hardware store and bought the wood and the stand.  Hey used the template to cut the flower with a router.  He then spray painted it white and I attached the ribbon to the edges.  I think it came out super cute.  Best part is that I can paint them whatever color I want and change the ribbon out to customize it to any party decor.  Here are some photos of just the stand themselves.


 Since it was a party for kids, I also made goody bags for them. 


I just took a piece of 12 x 12 green card stock and cut it down to four 6 x 6 pieces.  I used the Create a Critter cartridge to cut the pumpkin at 3.5".  I used My Pink Stamper's Everyday Sentiments for the Thank You and embossed it with linen embossing powder.  I also used white sakura pen to create the stitching around the edges. 

Well hope you enjoyed today's goodies.  Also stay tuned because on Friday I have some exciting news and can't wait to share it with you!!!!

Thursday, October 6, 2011

Birthday Madness

Hi all
We are into our crazy birthday month over here in our household.  We just celebrated our oldest daughters' 4th birthday a couple days ago and had so much fun.  I wanted to share a couple of projects that I did to celebrate her birthday.
The first project was a banner.  This is the first banner that I have made and really had fun doing it.  I wanted to embellish it more but ran out of time.  I plan on doing one for our younger daughter later this month and will definately try to do something different.  I think I may need to invest in a new camera because the white letters didn't show up so well in the picture but it looked great in person.

The Recipe is:
  • Waved triangle from Birthday Bash at 6.25"
  • Standard triangle from Birthday Bash at 6"
  • Lettering from Once Upon a Princess at 2.5"
  • I used craft ribbon to attach the banner pieces together and kitchen twine to hang the completed banners
The second project was a birthday card for my little girl.  She really loves bugs so I decided to go with a ladybug.  This was just a quick card that I through together last minute so it is nothing fancy but she still loved it.  The flowers were from her Daddy.  Some poor man in the future is going to be in trouble because my hubby always gets the girls flowers for special occasions.
The Recipe is:
  • Card base is 6" x 6" of white card stock
  • Image base is 5" x 5" of pink card stock that I embossed with the Swiss Dots Cuttlebug folder.
  • Ladybug from Birthday Bash at 4.5"
  • After the fact I also added white stickels to the tops of the bugs antenna
  • Sentiment is My Pink Stamper - Family & Friends
The last project I did was to make treat bags and cookies for my daughters school birthday celebration.  It is really nice that they allow us to bring in cookies for the kids and they all sing happy birthday at lunch.  I also made a triple batch of these cookies to send to my brother overseas.  He just left from is mid-tour leave and I thought that it would make going back a little easier.  So here are the cookies and treat bag toppers.


The Recipe is:

  • Topper base is an image from Birthday Bash at 4.5" and is embossed with the Swiss Dots folder for the Cuttlebug
  • Image base from Accent Essentials at 3.5" wide by 2.1" high
  • Birthday hat from Simply Charmed at 2"
  • Sentiment is My Pink Stamper - Sweetest Cupcakes
Hope you all enjoy these projects and please feel free to leave me comments on how I can make my pictures come out better.  It is either me or the camera and so far can't figure it out.  Anyhow hope you have a great evening.  

Wednesday, September 28, 2011

Crafting Away

So I have been doing some crazy crafting the last two days.  I can't share anything yet as I have not finished everything.  As I mentioned last week both my girls birthdays' are in October so I have been designing and crafting for their party and individual birthday day celebrations.  I also may not share something right away because I have some exciting news.  I have been asked to be a guest designer on another blog.  I am not going to share which one yet but stay tuned.  I want to pick the perfect project to do for the guest blog post.  Anyhow just wanted to check in and let you know what I have been doing.  Below is a preview pick of one of my projects that is not complete yet.  Please excuse the messiness of the table, as it was almost midnight when I took the picture and way too tired to clean up the mess at that point.  Hope you enjoy!!!

Tuesday, September 20, 2011

Life's Moments and Birthday Invites

Hi all

We have had alot going on around our house.  This past weekend my husband converted my baby girl's crib into a big girl bed.  He did this without my knowledge while I was out for a couple hours.  When I came home and found the bed converted I nearly cried from shock.  I wanted my baby to stay little forever and the reality is that she is growing up and getting bigger.  I was also a little scared of what the night time would bring but she has done wonderful about staying in bed and going to sleep.  Here is a litle pic of her proud as can be in her new bed.

And now onto the next thing that shows she and her big sister are getting older, the birthday invites.  Both my girls were born in October so this year since they are turning two and four we have decided that we will have one party to celebrate both occasions.  We just feel that we can't ask our family and friends to travel twice in one month for birthday celebrations.  So I have been working tirelessly on the invitations and finally got them finished.  Here is the invitation that I created.


We are having the celebration at a local fall festival so I thought pumpkin invites would be appropriate.  It took me two hours one night just to cut all the pieces and another two hours to assemble all the pumpkins.  In the future I may need to puck an easier cut for mass production projects like this.  Also my friend Angela showed me a super neat trick about attaching the ribbon.  She showed me that you can just run your tape runner down the back of the ribbon and it will stick pretty well to the paper.  I was going to use my Xyron machine and cut all the pieces down to size.  That would have taken forever so I am very grateful for this new method.  Anyhow I hope you enjoy the pics.  I now have to start working on the party decorations and such.  Have a wonderful day!!!

Invite Recipie:
  • Party Invite: Princess Party Cartridge at 5"
  • Pumpkins:  Simply Charmed at 2"
  • Crowns: Once Upon a Princess at1"
  • Text was done with a White Sakura pen
  • The ribbon and card stock was Michaels