Showing posts with label Cricut Imagine. Show all posts

Saturday, June 16, 2012

Kids Travel Tickets with the Imagine

Good evening , hope your weekend is going swell.  We have been outside much of the day playing in the great weather.  So the project I have for you today is an idea I got off the web.  In about a week I will be putting my kids and the dog in the car to make the 14 hour trek to my parents house.  That is 14 without stopping, did I mention it will be only me???  I am a bit nervous about the drive.  I have been scouring the web for ideas on how to keep the kids entertained without the mindless DVD player.  I came across the idea to give the kids tickets that signify how much time has passed, that way they have a way of quantifying how much time is left in the trip.  Being the crafty person that I am I couldn't just go and by raffle tickets, I wanted to make it a little more festive and fun.  So here is what I came up with:


So the jist is that I will give each of my daughters 16 tickets (I am being wishful) and every hour I will ask them to give me a ticket.  Then they can count how many are left to see how much longer we have to go.  On the set for my older daughter I put the numbers 1 - 16 on the back so that she can practice her number recognition.  Hopefully this will keep them entertained a little???

Ticket Recipe:

  • Ticket base cut from stamp on Elegant Edges at 2.2"h x 2.8"w
  • Top ticket cut from stamp on Elegant Edges at 1.8"h x 2.2"w
  • Font from Kate's ABCs cut at 1" and welded in CCR
I used the Imagine to get the colors which are from I came I saw I created weekly color challenge.  Love how bright they came out.  So I will have a few more travel related projects coming up next week.  Hope you have enjoyed and thanks for stopping by.

Wednesday, June 13, 2012

Father's Day Tie Card with Cricut

Good morning, hope your day has been starting well.  Today I have a super simple Father's Day card I made for my Dad.  Simple is always better when it comes to my father.  It doesn't take much to make him happy.  So here it is. 


Card Recipe:

  • Used the Cricut Imagine to create the charcoal grey colored card
  • Ties cut from Wrap it Up at 2"
  • Font is from Kate's ABCs cut at 0.6"
So that is that.  Super simple, I think the hardest thing was lugging my Cricut Imagine onto the table to get the color I wanted for the card.  I am entering this card into the Father's Day Challenge over at My Craft Spot.  Hope you enjoy and thanks for stopping by.

Friday, June 8, 2012

Birthday Card with Imagine

Hi all

Wow it has been a fast week!!!  We have been busy doing summer cleaning and frolicking in fountains.  I have been doing some crafting, getting used to my new space.  So for today I have a birthday card I made for my brother.  I wanted something simple so I used the Just Because Cards cartridge.  I love this one because all the components of the card are there if you want to whip up a quick card.  So here it is:


So I don't really need to list a recipe for this card.  It is all the card and image features from Just Because Cards cut at 6".  That is what is cool about this cartridge, you cut everything at the same size and it works into a complete card.  I am entering this in the color challenge over at I came, I saw, I created.  You can find the color codes on the webpage linked.  And incidentally this is a cartridge that I won in another challenge on  Renee's site.  Thanks Renee!!!  So that is that, hope you all have a great weekend. 

Wednesday, May 16, 2012

Teacher Appreciation Gifts with the Cricut

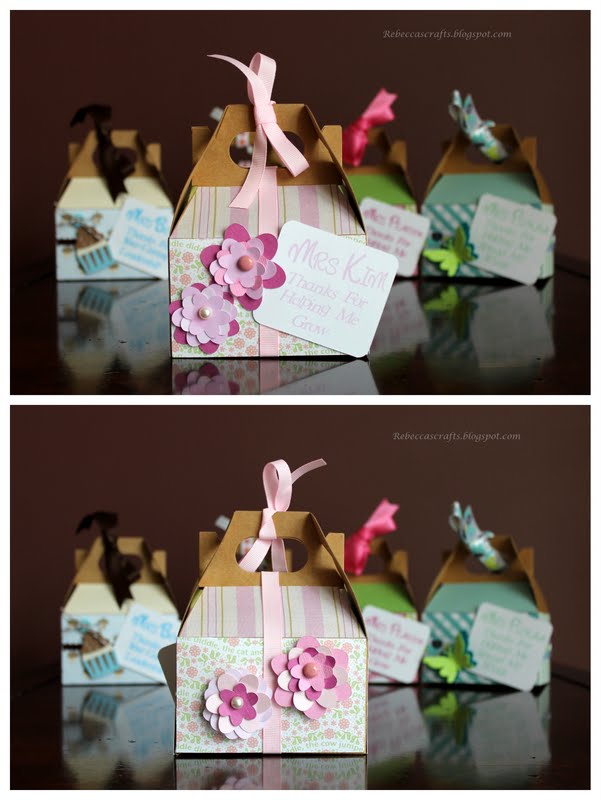
Hi all, I am back as promised with some Teacher Appreciation gifts I did last week.  These came together pretty fast and the teachers loved them.  I will not list a recipe for each, just a list of cartridges that I used to create them.


So I used these great gable gift boxes I found a Target in their dollar section.  Them came 3 to a pack for a dollar.  You can't beat that!!  I used a variety of patterned papers to decorate the sides of the boxes and some ribbon from my stash.  The tags I printed and cut with my Imagine.  It took a while to figure out how to get it to just print and them cut.  It involved putting the text on one layer in the Craft room and the square on another layer.  Then you just print on the paper first and then go back and cut the second layer afterwards.  I used the font from the Once Upon a Princess cartridge for all the tags.  The cartridges I used for the images are below.

  • Butterflies are from Kate's ABC's and Ultimate Creative Sampler
  • Birds are from Create a Critter
  • Flowers are from Kate's ABC's
  • Cupcake from Once Upon a Princess
So there you have it.  I filled the boxes with candy and a Target gift card.   I had a bunch of fun doing these boxes.  Thanks for visiting and hope you have a wonderful week. 

Wednesday, May 2, 2012

Mother's Day Card with the Cricut

Hi all.  How is everyone doing.  I am back to crafting again, yeah!!!  I have been working on a couple projects with Mother's day and Teacher Appreciation week approaching.  Today I have a Mother's Day card to share with you.


Card Recipe:

  • Card base is 6" by 6" DCWV Textured paper stack
  • Frame is cut on the Circuit Imagine at 5.5" x 5.5" using RBG code 153, 150, 71
  • Striped paper is DCWV Fabric paper
  • Flowers are cut with the Cricut from Forever Young.  The flower sizes are 1", 1.25", 1.5",1.75" and 2"
  • Pearls are Martha Stewart
  • Stitching is done with We R Memory Keepers Sew Easy and Floss
  • Mom is cut with the Ultimate Creative Sampler cartridge at 1.5"
  • Corner Chomper to round the card edges

I really love this card and can't wait to send it to my Mom.  This was also my first time using the Sew Easy tool and do really love how easy it is to use.  I am entering this card in the weekly challenge over at My Craft Spot.  I will have some more stuff up soon as I finish the projects.  Thanks for stopping by and hope you have a fabulous week.

Tuesday, March 6, 2012

My Craft Planner

Good Evening all, as promised I am back today to post a project that I have been working on for about a week now.  It is a craft planner.  Now, I know that it is already March but I still wanted to put together a planner for my crafts.  I feel like it will help me better manage my crafting time so that I can get the projects done that I really want without having to rush through them at the last minute.  This project took me about a week of 2 hour crafting sessions to complete but I think it came out really great.  This will be a picture heavy post, so if you just want the planner recipe just skip to the end!!!


The chipboard is cut to 11.5" x 9".  The cover paper is from this really cool stack that I found in the clearance section of Jo-ann's for $0.99.   It is a stack from Colorbok called English Moss.  It is unique because it is an overlay with coordinating card stock.  The picture below shows it much better.

Oh an the paper is not dirty, it is made to look distressed which is really neat.  Now the rosette on the front is also made from unique paper.  It is the new fabric paper from DCWV.  I really love it and can't wait to use more of it.  The paper is fabric with an adhesive backing.  So to make the rosette I just cut a strip of the paper and removed the backing and then started bunching it around.  The adhesive on the back of the paper made it stick together.  I then used a button and some twine from The Twinery.

The inner pages of the planner are from a website I came across on Pinterest.  They are a free printable that is unique to blogs/crafts planning.  Here is the link to the website. 


I loved the colors on these printables, which was really the basis for the planner design.  The artwork on the inside cover on the picture above is from the Cricut Imagine More cartridge.  I wanted to have a place to jot down notes.  The dividers between the months also have the notebook paper design on them as well.


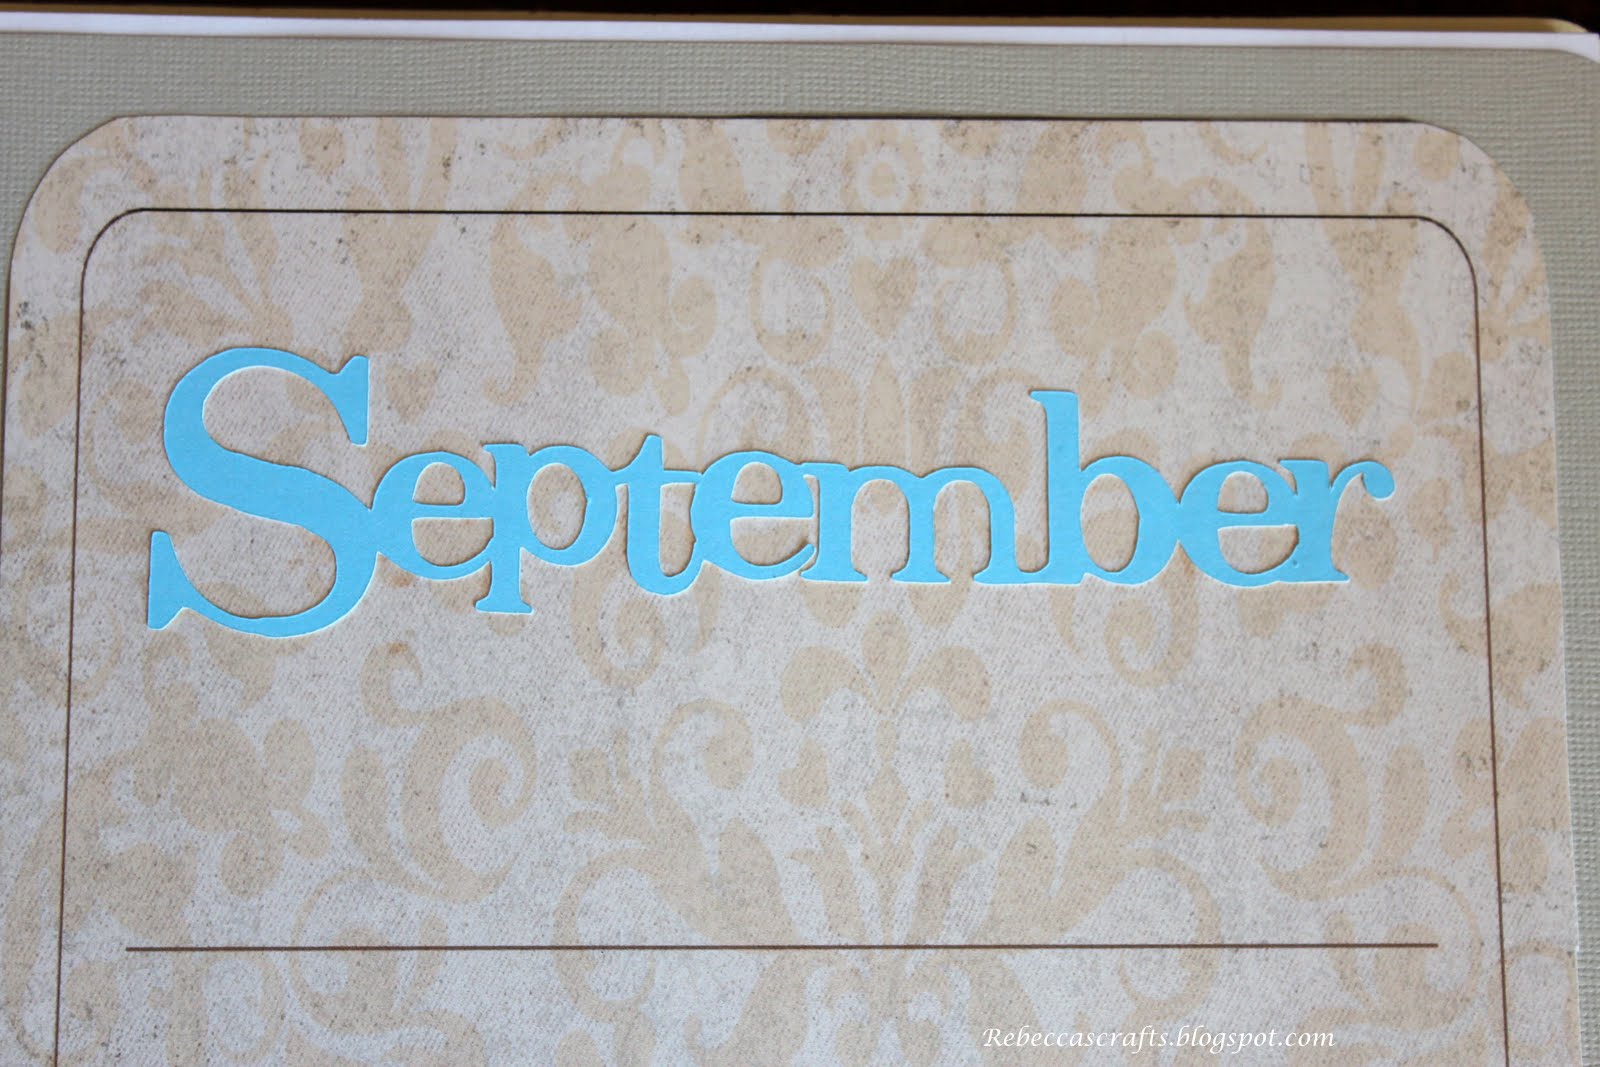
The month titles were made using the Cricut Craft Room and Kate's ABC's cartridge.  I made the first letter bigger than the rest of the letters and then welded them together to create one cut.  I also used the Imagine, so that I could match the colors.  The scalloped circles for the divider tabs were done using the free Craft Room Basics digital cart.  I used the Bind-it-all to bind the book.  An interesting tidbit is that I used We R Memory Keepers Cinch O-wire.  So you can use both in the Bind-it-all.


Planner Recipe:

  • Planner Pages - http://www.infarrantlycreative.net/2012/02/free-printable-blogplanner.html
  • Chipboard for covers cut to 11.5" x 9"
  • Cover paper from Colorbok English Moss overlay stack
  • Inner-cover art from Cricut Imagine More cartridge cut at 10"
  • Divider art from Cricut Imagine More cartridge cut at 10"
  • Scalloped tab circles from Craft Room Basics cut at 1"
  • Title text from Kate's ABC's cut at 1.8" and 1.25"
  • Month text from Kate's ABC's cut at 1.5" and 1"
  • Rosette from DCWV Fabric paper line
  • Twine from The Twinery


So that is that.  I hope I have inspired you to create your own planners for whatever purpose because I love looking at my personalized planner that didn't come off a store shelf.  Have a wonderful evening.


Thursday, March 1, 2012

Photo Book for a Toddler

Good evening all, hope your week as been great and productive.  I am excited that tomorrow is Friday!!!!  Yeah my hubby comes home and we can have a weekend of fun.  I am thinking Ice Skating.  My 2yo has never done it, but when we took her to see Disney on ICE a couple weeks ago she was so excited she lifted her little leg in the air and screamed "I skate I skate".  So I am thinking that should be on our agenda.  Anyhow, the craft I have for you today is a photo book I created for a friends toddler.  They get quite a bit of Christmas photo cards over the holidays and she was just letting her toddler pull then out of a bag to look at them.  When I said that I could bind them into a book my friend said sure.  So without further adieu:


The process for the book went as follows:  First I matted all the Christmas photo cards onto 9" x 6" card stock.  This was the smallest I could use based on the size of the photo cards and to ensure that when bound none of the pictures would have holes in them.  The covers are done using 12x12 chipboard that is then cut down to 6" x 9".  I then used pretty paper to cover the chipboard.  The really interesting thing I did was to create a magnetic closure for the book.  You can see from the first and last photo that there is a flap that opens.  This flap magnetically closes to the front of the book.  I got the idea from one of Heidi Swapp's episodes on My Craft Channel.  It is a video tutorial of an 8x8 book that she did with a magnetic enclosure.  I will leave all the details to her.  Next time I do something like this I will try to photograph it in the stages of the project.  I used my new Bind-it-all to bind the project.  The name Kiran was done with embossing powder.

I hopped by one of the blogs I read regularly and found out they were having a challenge.   I came, I saw, I created holds a color challenge every week.  This weeks challenge was to use Tangerine Tango, Tempting Turquoise, and Old Olive.  She gives you the RGB codes for each color.  My papers already had these colors in there, but because I needed to embellish the book a little, I pulled out my Imagine.  The camera  is cut from the Create-a-Critter cartridge at 3.5".   I used the Cricut Imagine to print and cut the camera with the exact RGB codes.  It came out great!!!  I then used some glossy accents on the lens, flash, and shutter button. 

I realize this is different from my normal posts were I usually give a craft recipe at the end of the post.  I decided to be a little more verbose in this post.  Please comment and let me know if you like either style better or would like to see a combination of both.  Thanks so much for coming by and have a great weekend!!!

Friday, December 30, 2011

Christmas Projects

Hi all

I wanted to share some projects that I did for Christmas.  I was furiously crafting up until the 23rd which is why I did not post much over the holidays.  Next year I will definitely start earlier, especially on my Christmas cards.  So the first project are our family Christmas cards.  This is the first year that I have done them all in house and wanted to make them as simple as possible.

It is a 6 inch by 5 inch card.  I used a snowflake embossing folder and maraschino twine from the twinery.  The reindeer is cut at 4 inches from the Christmas Cartridge that came with my Gypsy.  The stamps are from Recollections.


The second project is a tag I made for the cookie boxes I give to our post woman.  I try and bake yummy goodies to give to all the people that help us throughout the year and provide the services that make life easier.
After I made them I realized that they are a little big but I needed the space to write a nice note on the back.  The twine is from the Christmas pack at the twinery.  The gingerbread man is from Stretch your Imagination cut at 3 inches.  I actually used the Craft Room and my Cricut Imagine so that I could just print the colors and cut all at the same time.  I thought they came out pretty cute.


The last project I have is a decoration I made to decorate the table for the Christmas breakfast I made for my girls school.  I have decided that I do not like to buy teacher's gifts because they seem to get the same things so I make them all a hot breakfast instead.
This is just a piece of Christmas card stock for the background with the text cut from a Cricut Craft Room exclusive.  The exclusive cartridge is Teresa Collins Christmas Collage.  It is a digital cartridge that you can buy from the Craft Room.  This was really simple to make and came out beautiful.  I gave it to the school director as a gift and think I will make something similar for myself.
I hope that you have enjoyed these projects and maybe gives you some inspiration for next year.  My goal is to start my Christmas crafting alot earlier, like maybe July!!!  Have a Happy New Year. 

Friday, November 18, 2011

Thanksgiving Card

Hi all

I hope you are having a great week and not too stressed out about the upcoming holidays.  We are getting ready here.  So today I have a card that I did for my brother.  He is in Afghanistan and I wanted to send him something to remind him how much we love him and miss him during this holiday.  I made him cookies and a cute card.


I made this card using my Imagine and the Cricut Craft Room.  This is the first time that I have used my new Imagine to make an entire project, well except the ribbon.  I only used white paper as the Imagine allows you to put color to any image, even the standard cartridge images.  It was really fun.  I did have a little fuss with the Craft Room, but I am working through those issues.  I am sure that they are my issues!!!  Anyhow I hope you enjoy and have a fantastic Thanksgiving.


Card Recipe:

  • Card base is 5" by 6" and used a paper patter from the Imagine More Cartridge
  • Turkey cut at 4" from the Create a Critter cartridge
  • Sentiment cut at 1.5" from Simply Charmed
  • Golden Rod Stickles (After the fact I also added stickles to the top hat but never got a picture of it!!)
I have also entered this card over at the Fantabulous Cricut blog for their Challenge Me Monday Harvest Blessings.