Saturday, November 26, 2011

Advent Calendar and First Video

Hi all I hope you have had a fantastic Thanksgiving.  I having been having alot of fun with my family, with way more fun to be had next week.  So I have something exciting today.  I made my very first video!!!  Please no over the top laughter as it is my first video.
Anyhow I am going to share with you the Advent calendar that I made.  I really love how it turned out and plan to use if for years to come.  I got the idea here and made some simple changes that I think made it a little special.  I have been using all of the inspiration floating around the blog-o-shpere and am really thankful for all the ideas.
So here is the calendar and video of how to make the pockets.  The original author used library pockets but since I didn't have any of those lying around my video shows how I made them and then embellished them.


Recipe:
  • For the pocket cut down a manilla file folder to 8" x 4" and score at 3.75".  See the video for more instructions
  • The base layer ornament is 2.77" x 3.75" from Simply Charmed
  • Top layer ornament is 2.36" x 3.2" from Simply Charmed
  • Numbers at 1.25" from Plantin Schoolbook
  • Insert card base is 3.5" x 3" from Once Upon a Princess
  • Insert card top layer is 3.10" x 2.30" from Once Upon a Princess
I hope you enjoy and have given you more ideas for a DIY Advent calendar.

Friday, November 18, 2011

Thanksgiving Card

Hi all

I hope you are having a great week and not too stressed out about the upcoming holidays.  We are getting ready here.  So today I have a card that I did for my brother.  He is in Afghanistan and I wanted to send him something to remind him how much we love him and miss him during this holiday.  I made him cookies and a cute card.


I made this card using my Imagine and the Cricut Craft Room.  This is the first time that I have used my new Imagine to make an entire project, well except the ribbon.  I only used white paper as the Imagine allows you to put color to any image, even the standard cartridge images.  It was really fun.  I did have a little fuss with the Craft Room, but I am working through those issues.  I am sure that they are my issues!!!  Anyhow I hope you enjoy and have a fantastic Thanksgiving.


Card Recipe:

  • Card base is 5" by 6" and used a paper patter from the Imagine More Cartridge
  • Turkey cut at 4" from the Create a Critter cartridge
  • Sentiment cut at 1.5" from Simply Charmed
  • Golden Rod Stickles (After the fact I also added stickles to the top hat but never got a picture of it!!)
I have also entered this card over at the Fantabulous Cricut blog for their Challenge Me Monday Harvest Blessings.  


Thursday, November 10, 2011

Cricut Craft Room Works!!!!

Hi all
So I have had access to the new Cricut Craft Room for a couple months now, but have never been able to cut with it.  I work with a Mac and that has primarily been the issue as the update process would continually get stuck.  After scouring the Cricut message boards to no avail I gave up on cutting with the Craft Room.  I would use the online version to design and then export the files to my Gypsy for cutting.  Well I think that yesterday they finally announced the Craft Room was open for everybody to use and I decided to go ahead and give it another try.  To my surprise there was an update available for the Mac and when I did this and began updating my Expression it actually worked!!!  I just made my first cut after being able to design on my computer. 

I also used the free Craft Room Essentials images that are available for everyone to use.  So just wanted to share because I have been excited about this for a while and am really stoked it actually worked. 

Monday, October 31, 2011

Halloween Treats

Happy Halloween everyone!!!  I hope yours is not so scary but very sweet.  I have a quick project to share with you today.  My daughters Halloween party at school was today and I signed up to make the edible treats for the goodie bags.  I decided to make cake pops.  Of course I got this idea a long time ago from Bakerella.  They are super easy to make, just go on over to her site to learn how.  I made orange and purple ones.  I also had to include a cute tag.  Here are the pics. 


The tag base is from Tags, Bags, Boxes and More on the Gypsy cut at 2.75" x 4".  The cute little ghost is from Simply Charmed cut at 2.0".  The sentiment is a stamp from the dollar bin at Michael's.  I have decided to enter this in to the weekly challenge over at Bitten by the Bug 2.  The challenge was to use the ghost from Paper Doll Dress Ups but I don't own that cart, so used this cute guy instead.  Hope you enjoy and have a safe Halloween. 

Saturday, October 29, 2011

My Creative Time Design Team Call

Hi all, I came across the blog My Creative Time and saw that Emma was having her first design team call and thought maybe I will enter.  Well after much thought I came up with a project that I had been thinking about doing for a while, something 3-D.  I decided that I would make a purse that could hold a gift card for a birthday present.  I really had a great time putting this together and it was easier than I thought it would be.  So here it is:


The Recipe:

  • The purse is the flower9 purse cut from Forever Young cut at 6".
  • I decorated the purse before assembling it so that the glue would dry flat.
  • I just used random embellishments from my stash and a little bit of silver stickles.
  • The sentiment is My Pink Stamper Family and Friends (sorry Emma I don't own any of your stamps, YET!!)
I hope you enjoy this and inspires you to do something 3-D.  And wish me luck with the DT call.  Thanks Emma for the opportunity and all the fabulous inspirations!!

Friday, October 28, 2011

Birthday Madness - Final Chapter

Hi all,  I hope you are having a wonderful Friday.  We are finally done with birthday month here after celebrating our little girl's actual birthday last weekend.  And I did a few things for her.  Of course I made her a birthday banner and a card, but the most exciting thing is that I actually got her first year scrapbook done!!!  This is really awesome to me because I didn't get Charlotte's first year done until she was three!!!  So without further adieu here are the pics.  I am not including any recipes with these because I used so many different carts that honestly I can't really remember them all. 
Isn't she a cutie!!!


Friday, October 21, 2011

My Guest Post for You Had Me At Craft

Hi all

So here is my exciting news.  I applied to be a guest designer for Alex over at You Had Me at Craft and she picked me!!!!  Please stop by her blog and see all of her fantastic inspiration.  So here is the project that I did as well as the instructions and lessons learned for the project.

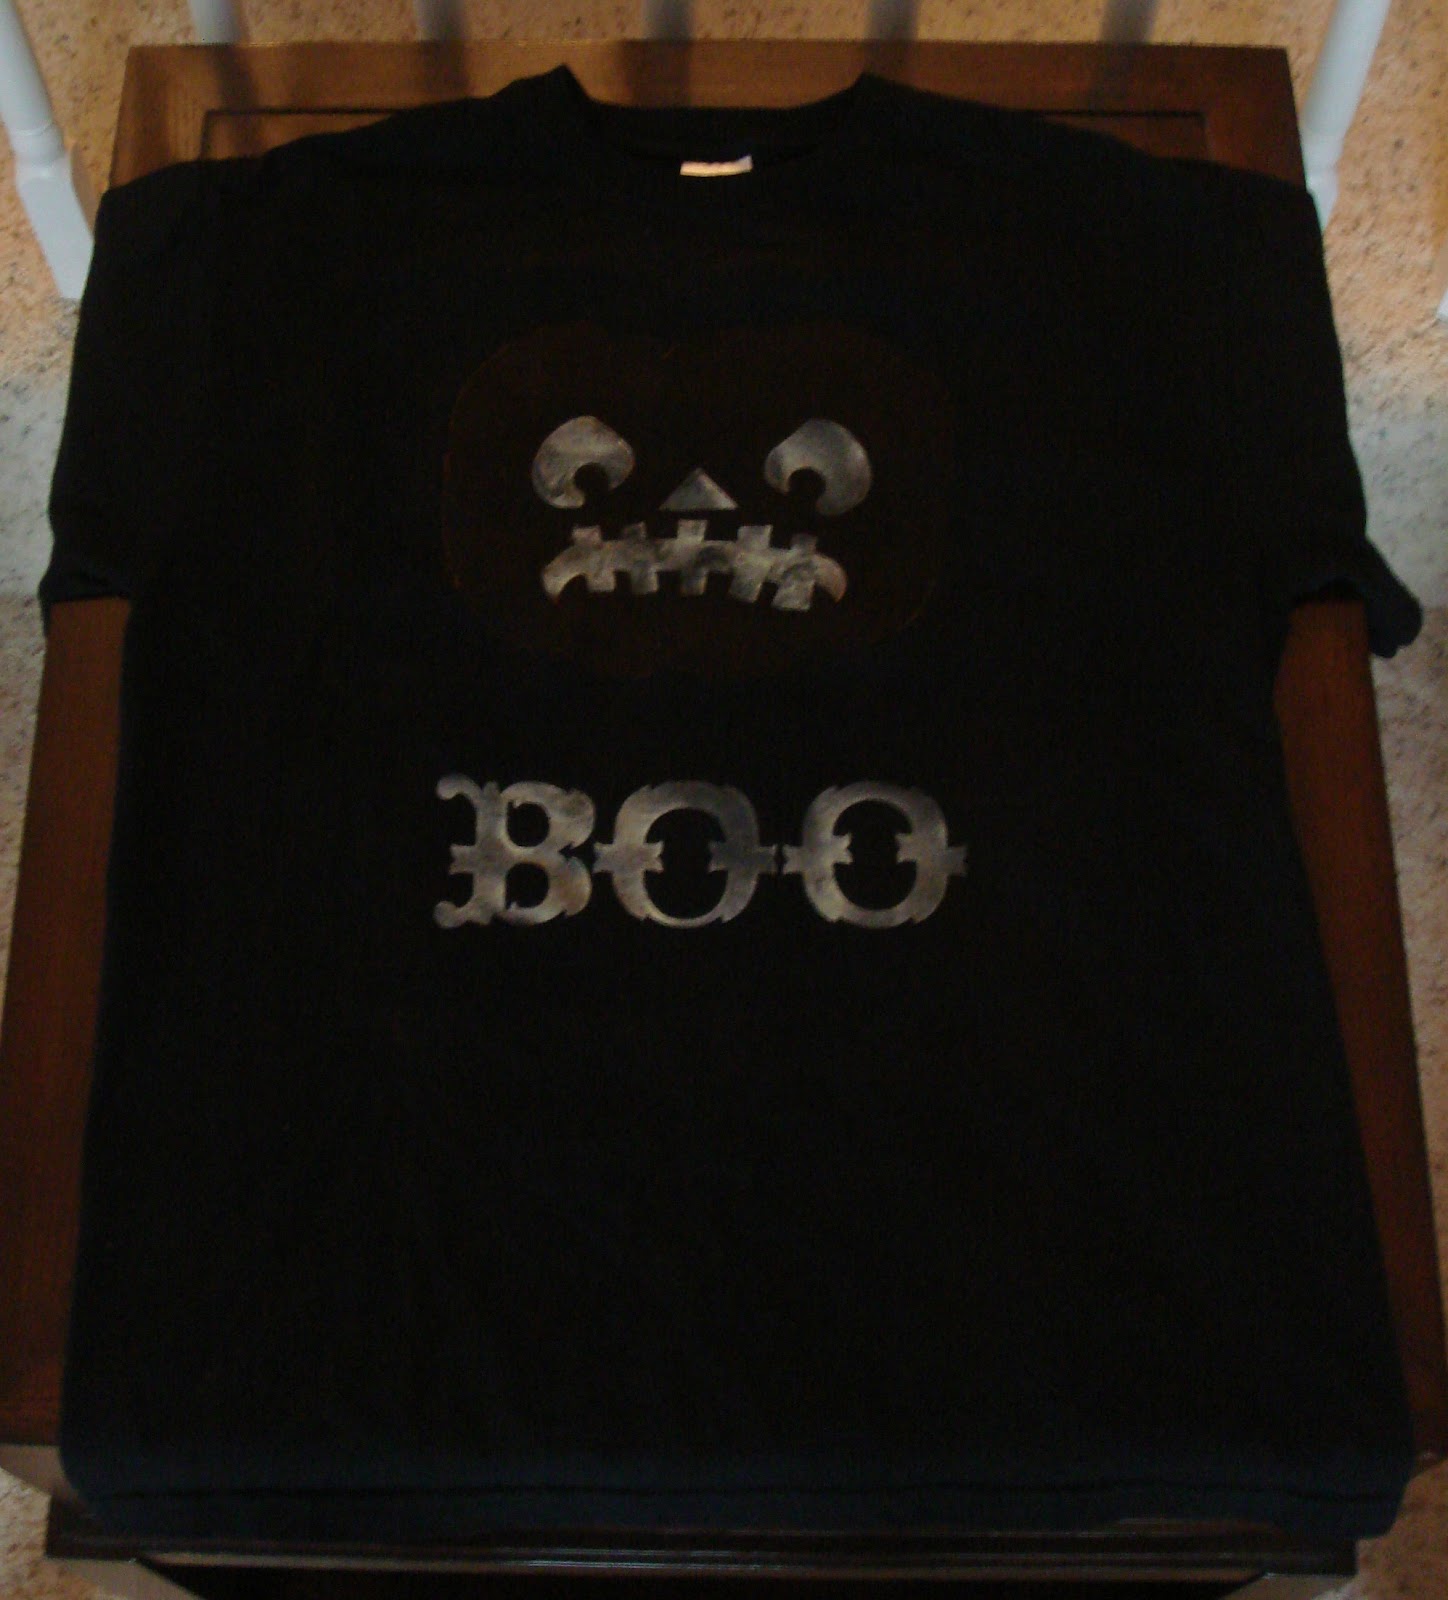
Today I have done some T-shirts for you all.  They are Halloween T-shirts to go with the upcoming holiday and so that I could have something to wear when I take my girls trick-or-treating this year.

This first T-shirt is a scary one.  The images are cut from the Happy Hauntings cartridge.  I used neon orange fabric spray paint for the scary pumpkin.  The cool thing about this shirt is that for the face and word I used glow-in-the-dark fabric spray paint.  In the dark, you can really only see the face and word.  One thing I did learn is that I don't like the spray fabric paint.  It is hard to control where it goes and rather drippy.  Lessons learned!!!

This next shirt is an homage to my love of wine!!  The wine glass was cut from the Simply Charmed cartridge and the text was from the Happy Hauntings cartridge.  I used regular green fabric paint for the wine glass.  Another cool feature is that the wine and the text were done with glow-in-the-dark purple fabric paint.  It really glows well, although I couldn't get a good picture to show you.

This last shirt was done using some cool iridescent orange paint and standard black paint.  Both images are again from the Happy Hauntings cartridge.

And know on to the supplies and instructions.

Supplies Needed:
1.  Freezer paper:  I use Reynolds brand from my local grocery store
2.  Cotton T-shirts.  Pre-wash the shirts before proceeding with the project
3.  Fabric pant
4.  Foam brushes

How To:

1.  Select an image to cut.  I used my Cricut to cut most of the images from the Happy Hauntings cartridge.  When you cut the freezer paper, place the paper non-glossy side down on the mat.  If you are cutting an image that is not symmetrical you will need to flip it so that you are cutting the mirror image.  I did this using my Gypsy and I think you can do this in the Craft Room.  Really you only need to do this for words as images will work in either direction.

2.  After removing the freezer paper from the mat (you will be using the outline of the image not the actual cut pieces), break out the iron and ironing board.  Place the glossy side down on the fabric and iron on the highest setting that does not have steam.  It should only take a few minutes.  You will know when it is done when the inside edges don't lift up easily.  Allow it to cool and then test the edges to see if you need to go over it again.

3.  Choose your paint colors and using a foam paint brush apply the paint to the shirt inside the stencil.  It works best if you brush from the edge of the stencil to the inside to ensure a clean line. 

4.  Let dry 3-4 hours or overnight for best results and then pull the freezer paper off the fabric. 

Thanks for stopping by and checking out my T-shirts.  Happy Halloween everyone.